Pages

.

Roasted Zucchini with Orange & Lemon ♥

Ready to lighten up, vegetables turned spring-light
Today's vegetable recipe: Easy roasted zucchini recipe. Tossed with citrus zest and juice. Low carb. Weight Watchers 1 point.

Spring is upon us: any day now, really truly positively. Already my seasonal sensibility for vegetables and other foods is doffing the winter, donning the spring.

This easy zucchini hit just the right spot on a cusp-ish day, spring-ish in the morning, wintry-ish in the afternoon. Laffodil-daffodils, where are you?!

NEXT TIME I will try-try-try to remember to line the baking sheet with foil!

THE QUESTION IS Will Freddie and Alex like the zucchini? Their Mum, my pal Charlotte, is collecting "S is for summer squash" recipes this week. Big news! Their own veggie venture will soon be a book. "The Great Big Veg Challenge" -- how to get your children eating vegetables happily -- will be published in July. Congratulations to my vegetable-curious friends all the way in England! I couldn't be prouder!

THE ANSWER IS Apparently Freddie likes it! His Mum wrote: "Freddie is just going to bed and wants to send you a message." The ingredients look delicous, and I like the idea of the lemon with the extremely tasty zuchinni. I really look forward to eating this (by the looks of it) mouth-wateringly tasty meal. First impression:10/10.


MARCH FAVORITES
Each month, I look back through the recipes for my favorite vegetable recipes, just three, a favorite side dish, a favorite vegetable salad and a favorite soup. For anyone overwhelmed by all the vegetable recipes here, the Favorite Vegetable Recipes is a great place to start.

FAVORITE VEGETABLE SIDE DISH - Stuffed Artichokes

FAVORITE VEGETABLE SALAD - Bok Choy Salad with Homemade Creamy Vinaigrette

FAVORITE SOUP RECIPE - Weight Watchers Mexican Zero Points Soup


ZUCCHINI RECIPES from the ARCHIVES
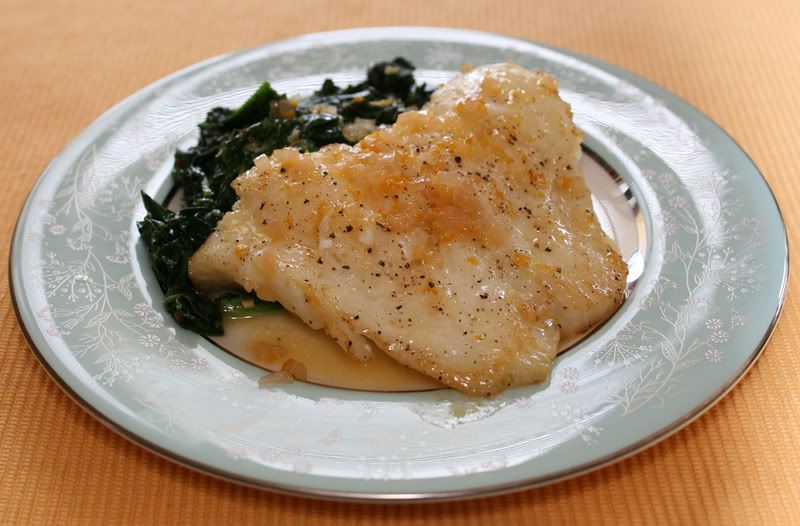
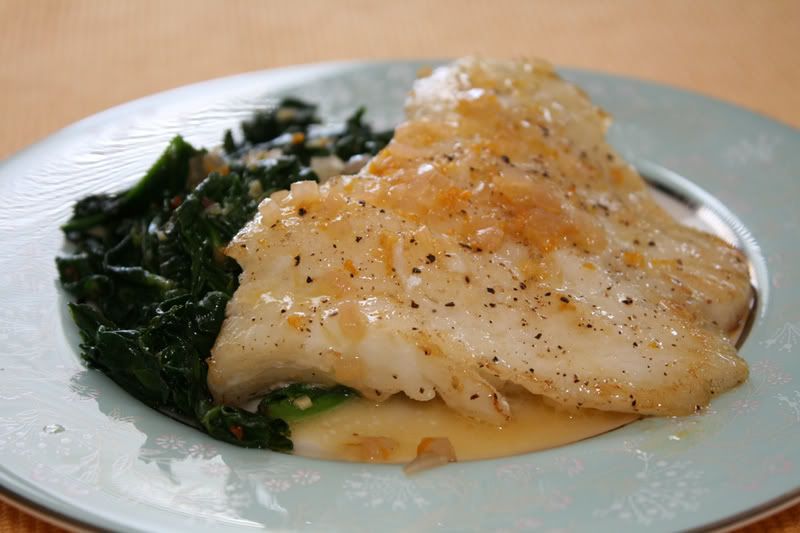
~ Roasted Zucchini with Lemon, my favorite roasted zucchini, with roasted lemon slices, goes great with Maple Glazed Salmon from Kitchen Parade ~

~ more zucchini recipes ~
~ more roasted vegetable recipes ~


ROASTED ZUCCHINI with ORANGE & LEMON

Hands-on time: 15 minutes
Time to table: 45 minutes
Serves 4

1 pound zucchini, stem, blossom ends trimmed
1 tablespoon olive oil
1 teaspoon kosher salt

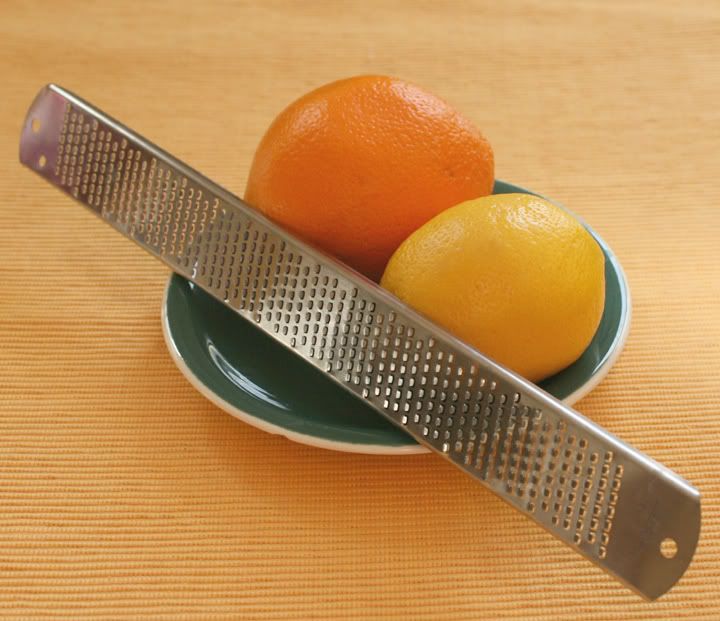
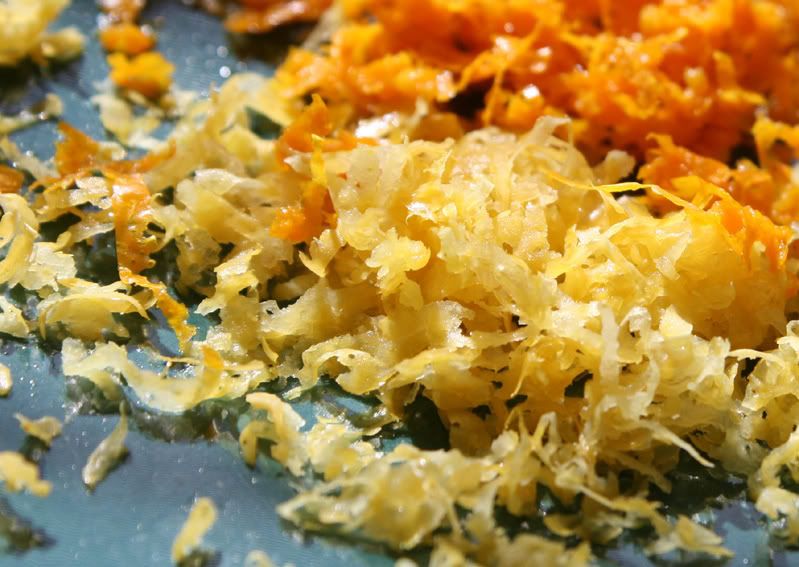
Zest & juice of 1/2 an orange
Zest & juice of a lemon
Pepper to taste

Preheat oven to 500F.

Cut zucchini into equal-size pieces. (For medium zucchini, this likely means cutting into quarters lengthwise, for small halving, then cross-wise into 1-1/2 inch slices. I cut on the diagonal but this nicety was lost during roasting.) Toss well with olive oil and salt. Arrange on foil, with sides crimped to contain juices. Roast for 10 minutes, then toss a bit, then roast for another 10 minutes or until some sides are brown. Toss with zest and juices, then add pepper to taste.


KITCHEN NOTES
The very hot oven warped a not-inexpensive baking sheet. It did recover its shape after cooling but next time I'll use something like Corningware lined with foil for easy clean-up.
The inspiring recipe called for tossing with fresh mint leaves, too.


PRINT JUST A RECIPE! Now you can print a recipe without wasting ink and paper on the header and sidebar. Here's how.

NEVER MISS A RECIPE! For 'home delivery' of new recipes from A Veggie Venture, sign up here. Once you do, new recipes will be delivered, automatically, straight to your e-mail In Box.


Eat more vegetables! A Veggie Venture is the home of Veggie Evangelist Alanna Kellogg and is the award-winning source of free vegetable recipes, quick, easy, and yes, delicious. Start with the Alphabet of Vegetables or dive into all the Weight Watchers vegetable recipes or all the low carb vegetable recipes. © Copyright 2008

reade more... Résuméabuiyad

Stuffed Artichokes ♥ Recipe

Today's recipe: Fresh artichokes stuffed with a simple bread-crumb mixture, then baked.

Until now, anyone searching A Veggie Venture for artichoke recipes might well come away disappointed. In three years, I've collected only four recipes -- not one calling for fresh artichokes. Nil. Nada. Zip. Zilch.

I just didn't 'get' artichokes. They were eeeh, okay, hardly worth the fuss. "Here, just eat the heart," I heard time after time. Eh.

I did buy artichokes, half-writing posts in my head right there in the produce department. Two years in a row, their spiked leaves dried to nothing in the fridge. This year, they languished a good week before I forced myself to do something -- anything -- with them. Suddenly, one warmish spring evening, I was inspired to pull out the weapons that anyone veggie averse should have at hand, bacon and cheese.

And oh glory, I get it, I finally get it. And yes, artichokes are a tad fussy (especially stuffed) but way easier to trim and prep than all those prickly leaves and complicated diagrams lead you to expect. Call me glad it's early in artichoke season: you see, I've got some catching up to do.

SO ONCE THEY'RE STUFFED AND BAKED, HOW DO YOU EAT ARTICHOKES? With your fingers! I served these in big bowls, ones large enough for leftover leaves. Starting from the outside, pull off a leaf and scrape the fleshy part at the leaf's bottom between your teeth, discard the rest. After all the leaves are gone, you'll find the artichoke heart at the bottom, a cylinder of meaty flesh. Depending on the size of the artichoke, the heart will be just a couple of bites big but it's worth saving for last and savoring. If someone offers their heart, say yes!

STUFFED ARTICHOKES

Hands-on time: 25 minutes for 2
Time to table: 90 minutes
Serves as many as needed

STUFFING, per artichoke
1/2 tablespoon olive oil
1/4 cup onion, chopped small
1/2 ounce pancetta, chopped (optional, not used in the inspiring recipe)
2 cloves garlic, slivered
1/2 teaspoon dried thyme (the inspiring recipe called for fresh)
1/4 teaspoon dried ground fennel
1/2 cup fresh breadcrumbs
1 tablespoon fresh Parmesan cheese, grated
1/2 tablespoon capers (I was out, didn't use these, think the saltiness would be excellent)
Salt & pepper

Lemon
Vegetable/chicken broth
White wine (the inspiring recipe uses this too, I used only broth)

Preheat oven to 400F.

In a skillet, heat the olive oil til shimmery. Add the onion, pancetta and garlic and cook til just soft. Stir in the thyme, fennel and bread crumbs and cook, stirring often, til bread crumbs begin to brown. Stir in Parmesan and capers. Season to taste.

While cooking the filling, prep the artichokes. Rinse the artichoke. Pull off the outer layer of leaves. Slice off the stem (these need to be able to sit flat.) Slice off the artichoke's tip, about 1 inch deep. With scissors, snip off the tips of the outer leaves, they're sharp!) Rub the cut edges with lemon (this is to prevent browning.) With your fingers, reach into the artichoke's center, spreading the leaves. Pull out the interior center leaves to expose the prickly choke. With a serrated grapefruit spoon or melon baller, scoop out the choke and discard. If prepping ahead, drop artichokes into lemon water before proceeding. (See Simply Recipes for a great photo tutorial on prepping artichokes. The one difference is that for this recipe, we're going to remove the choke before cooking.)

Filling the artichokes: With a small spoon, stuff a tablespoon of filling into the center. Then, working from the outside in, put a half teaspoon of filling between each layer of leaves. This is a little fussy but not hard. I actually started at the second layer of leaves, so none of the filling would fall out between the outside leaves.

Place the artichokes upright in a baking dish. Pour the broth and/or wine into the bottom, about an inch or so high. Cover with foil and bake for an hour. Enjoy!!


A Veggie Venture - Printer Friendly Recipe Graphic


MORE VEGETABLE INSPIRATION & RECIPES
~ more artichoke recipes ~
~ more stuffed vegetables ~


Eat more vegetables! A Veggie Venture is the home of Veggie Evangelist Alanna Kellogg and is the award-winning source of free vegetable recipes, quick, easy, and yes, delicious. Start with the Alphabet of Vegetables or dive into all the Weight Watchers vegetable recipes or all the low carb vegetable recipes. © Copyright 2008


reade more... Résuméabuiyad

Tool Tip: Asparagus Steamer

My make-shift asparagus steamer, a must-have during asparagus season
One of my favorite kitchen gadgets, a tall narrow pot to steam asparagus.

By today's standards, my kitchen is small. Whenever I peer longingly into beautiful new kitchens and wish mine were bigger, more open, more something, I think of my 70-something west-door neighbor who cooked and fed husband and six kids in the same space -- and once again feel content with my kitchen, just the way it is.

Few kitchen tools are allowed a permanent home in my kitchen, especially tools that are single-purpose. But my commitment to an asparagus steamer started early in this vegetable recipe odyssey. On Day Three's Lemon Asparagus, I sang the praises of an asparagus steamer. By Day Seven's Asparagus Tapenade, I'd finagled a decent alternative using a 9x13 pan. By Day Seventeen's Ginger Asparagus, I'd rigged one up -- very inexpensively -- using a tall narrow pot from Target and an everyday expandable vegetable steamer.

Now, upon the first asparagus sightings, I move this makeshift asparagus steamer from the back of a cupboard to the front, where it'll be easy to reach. Why? An asparagus steamer makes it soooo easy to steam perfect asparagus every time -- because the asparagus spears stand upright while steaming, the denser ends are closer to the heat source, the tender tips are further away.

PS If it's easier to buy an asparagus steamer, go for it! After all, asparagus season is short!


From the ARCHIVES
~ so many asparagus recipes! ~
~ more tool tips ~


Eat more vegetables! A Veggie Venture is the home of Veggie Evangelist Alanna Kellogg and is the award-winning source of free vegetable recipes, quick, easy, and yes, delicious. Start with the Alphabet of Vegetables or dive into all the Weight Watchers vegetable recipes or all the low carb vegetable recipes. © Copyright 2008

reade more... Résuméabuiyad

Country Cornbread ♥

Corn bread, a great way to use up leftover ham and other tidbits
Today's recipe: Homemade cornbread made supper-substantial with ham, sun-dried tomatoes and cheese. A 'concept' recipe.

Who's looking for good ways to use up leftover ham? Me too, it seems, always. Add a bowl of soup and this homemade cornbread makes for a filling supper. [Note to Vegetarians]

NEXT TIME I'll use bigger chunks of cheese so there are pockets of cheesiness.

LEFTOVER REPORT Don't forget to refrigerate any leftovers, there's meat in this cornbread! This cornbread remained fresh and moist for the second day.

NEW PRODUCT ALERT I love-love-love what I call 'fresh' sun-dried tomatoes. They're not the dried and dusty sun-dried tomatoes that require reconstituting in boiling water, neither are they the sun-dried tomatoes soaked in oil and calories. 'Fresh' sun-dried tomatoes are fat and plump, more like dried plums/prunes. They last in the fridge for several weeks - except that they're easy to snack on, too. Good news, they've shown up recently at Trader Joe's (St. Louisans, check Dierbergs and Global Foods first, in the produce departments) so are more widely available. Like all dried fruits, sun-dried tomatoes are calorie-dense foods and it's easy to toss back a handful without thinking. See nutrition analysis for sun-dried tomatoes.


MORE RECIPES for LEFTOVER HAM from the ARCHIVES
~ Baked Pasta with Ham, Tomatoes & Peas, with pasta ~
~ 15-Bean Soup, with beans ~
~ Bubble & Squeak, with potatoes ~
~ Scandinavian Pea Soup from Kitchen Parade, with split peas ~

~ one year ago this week, Green Chutney, a great last-minute appetizer recipe ~
~ two years ago today, Beet & Walnut Salad, the single highlight from a Rachael Ray 30-Minute Meal ~


COUNTRY CORNBREAD

Hands-on time: 25 minutes
Time to table: 1 hour
Serves 8

Preheat oven to 350F.

WHISK:
3 eggs
1/3 cup olive oil
1/3 cup buttermilk

ADD:
1/4 pound chopped ham (I used leftover smoked ham)
1/4 pound cubed cheese (I used gorgonzola)
1 ounce (six halves) sun-dried tomatoes (not the ones in oil, the 'fresh' ones), slivered

STIR TOGETHER:
1 cup flour, sifted to aerate before measuring
3 tablespoons cornmeal (I used yellow, stone-ground would be great)
1 teaspoon baking powder
1 teaspoon baking soda

Lightly stir flour mixture into batter, stirring just until incorporated. Turn into greased 1" round cake pan. Bake for 30 minutes or until a knife inserted into the center comes out clean. Let cool 5 minutes, cut into slices and dig in!


PRINT JUST A RECIPE! Now you can print a recipe without wasting ink and paper on the header and sidebar. Here's how.

NEVER MISS A RECIPE! For 'home delivery' of new recipes from A Veggie Venture, sign up here. Once you do, new recipes will be delivered, automatically, straight to your e-mail In Box.


Eat more vegetables! A Veggie Venture is the home of Veggie Evangelist Alanna Kellogg and is the award-winning source of free vegetable recipes, quick, easy, and yes, delicious. Start with the Alphabet of Vegetables or dive into all the Weight Watchers vegetable recipes or all the low carb vegetable recipes. © Copyright 2008


reade more... Résuméabuiyad

Lemons are so Beautiful


Do you feel warm and peaceful now?


reade more... Résuméabuiyad

Experimenting with Sea Bass

I went to the fish market yesterday looking for sea bass. I had never cooked with it before, though had enjoyed it a great deal in a number of restaurants (for $20+ per plate).


There it was, behind the glass case, for $14.99 per pound. I asked for 1/3 lb. of the fish, and to please remove the skin (very important to me). The woman behind the counter asked me if I wanted the thicker end of the fish, or the thinner end, closer to the tail. I told her I had no idea, and then told her I planned to saute it and serve with a citrus sauce. She decided to give me the thinner end.


She cut off a piece, which ended up weighing just under 1/2 lb. When I saw the size, I told her that was fine. The fillet cost $7.35. I was okay with that - especially since I know how good the stuff is, and how much it costs to have someone else make it for you.


Sea bass is really good! While you may think it looks like haddock ad probably tastes like it, it's so much finer than haddock. I have nothing against haddock, but it is truly inferior to sea bass. Sea bass, when cooked right, is moist and flakey at the same time. It's soft, but holds its shape. It tastes really good (did I mention that?).


Well, I was pretty upset when I opened the package today to make the fish and the skin was still on it. But I will say that it was a fine piece of fish. It had absolutely no smell to it and it was as fresh as could be.


Some people probably like the skin. I'm sure some people think it's pretty. But I want nothing to do with it. So I set out to remove the skin. Honestly, it wasn't that easy.


I have a pretty decent set of knives - Wustoff Trident knives that my brother bought us for a wedding gift. I used the boning knife to try to closely shave off the fish from the skin. But the skin didn't remove very easily and it wasn't the cleanest cut. Here's a picture of what it looked like. I think that if I had done a good job, there wouldn't be any fish flesh left on that skin.


While having a clean skin removal looks good, I wasn't upset with my hatch job just because of the looks - that fish is expensive and I didn't want to leave it on the skin. Oh well! Perhaps it will be easier next time.


Here's what the skin looks like on the other side.


My sea bass experience turned out to be really successful in the end. I chose a recipe for sea bass with a citrus butter sauce. Here's the final product, which I served with sauteed spinach.


reade more... Résuméabuiyad

Chilean Sea Bass with Citrus Butter Sauce


Chilean Sea Bass with Citrus Butter Sauce
Adapted from
Italian Food Forever (Deborah Mele)

1 1/2 to 2 Pounds Sea Bass
1-2 Tablespoons Extra Virgin Olive Oil
Salt & Pepper to taste


For The Sauce:

1 lemon
1 orange
1 teaspoon orange zest
1 teaspoon lemon zest
½ shallot, finely minced
3/4 Cup White Wine3 tablespoons unsalted butter

1 Recipe Sautéed Spinach

Zest the lemon and orange using a microplane before juicing them.

Preheat the oven to 400 degrees.

Sautee the shallot in a saucepan. Juice the oranges and add them to the same saucepan. Cook over high heat until the juice is reduced to about 1/2 and is thickened. Add the wine and reduce again to 1/4 of the amount is left. Lower the flame to the lowest setting. Add the butter and stir until melted into the sauce. Keep warm on the lowest setting until the fish is ready.


Heat the oil in a heavy, ovenproof pan (or use nonstick and transfer to a different dish later). Season the sea bass with salt and pepper. Add it to the heated pan and sear it on both sides in the hot oil until lightly browned. Place the fish into the hot oven and bake for about 12-15 minutes or until the fish flakes with a fork, but remains moist inside. If you are using thicker fillets, you may need to cook it up to 20 minutes.

Serve with Sauteed Spinach.


reade more... Résuméabuiyad

Sauteed Spinach


pictured above with Chilean Sea Bass with Citrus Butter Sauce


Spinach cooks down a lot! Don't worry about what looks like too much spinach. You'll be left with almost nothing.


Ingredients:

One bag spinach
one large clove garlic, finely minced
1-2 Tablespoons extra virgin olive oil
salt and pepper, to taste
red pepper flakes, to taste


Remove and discard the large stems from the spinach. Dry off with paper towels.

Heat the oil in a pan. Once heated, add the spinach, salt and pepper. Stir around with a spatula.

This is about 1/4 of the bag of spinach as it enters the pan:


As it cooks down, add the garlic and red pepper flakes. Continue to stir around with a spatula as it cooks.


It will cook down a lot. This was the little clump of cooked spinach that was left:


It was just enough for one serving.


reade more... Résuméabuiyad

The Zest, The Zester, and The Zested


Here it is, the microplane zester and its two victims: Mr. Lemon and Mr. Orange.

I have no idea where this zester came from. I think I got it for free from some cooking-type of purchase. A magazine perhaps? Either way, I'm so glad to have it. It makes getting the zest an effortless pleasure. Not only that, but it's designed so that you only get the top layer, and therefore you have a better quality zest. They say that if you get the pith (what is just under the zest), it will be bitter.

You can see in this picture just how little is taken off the surface of the fruit:


Just look at that beautiful, paper-thin zest:


You just can't get that with a knife, or with other types of zesters.

Like I wrote, mine was free. But if I were to buy one on Amazon.com, I could get this basic type with no handle for $8.00. The same one with a handle is $10.00. Totally worth it!


reade more... Résuméabuiyad

The Great Cookbook Throw-Away

Where would so many of us be now without cookbooks? I pay homage to the wonderful chefs and cooks who create and share with the world.

But I have a secret to share with you. Psst..... I have a bit of a clutter problem. Actually, I’ll admit that “a bit of a clutter problem” is a gross understatement. And to make it worse, I have a constant battle going on inside of me, a little devil who encourages me to hate doing something about it.

Let’s put it this way. My husband, Joe, wants me to tell you that I have a high tolerance for filth and squalor. It’s true.

So, things build up, and my inner battle explodes, and I go on a rampage from time to time. A couple of years ago, my cookbooks were at the receiving end of my battle, and I through almost all of them away.

It wasn't that I had a problem with the contents, I just had a problem with their physical existence.

In my personal opinion, bookshelves are ugly. You get a mishmash of books that don’t go together. You squeeze them on these shelves. Loose papers end up between them, magazines, 3-ring binders. Then you end up with a wall that is full of uncoordinated dust-collectors, and I'm very allergic to dust.

But throwing away all my cookbooks was a good thing, and that’s because of computers and the Internet. I was already using the Internet much more than my actual books. The variety of recipes is tremendous, and just a click away. And I can copy and paste them into a Word document, and store them in the clutter-free file cabinet on my hard drive. I can even store them in multiple locations. Oh, and if I still can’t find what I’m looking for, I can do a search. It’s just great.

Not only did the computer help me get rid of the clutter and dust, but there are such great sites to visit. An original recipe is posted, and then all of the people who make it can rate the recipe and comment on it. They can tell us the things that worked, and the things that didn’t. And they can tell us about the changes they made to the recipe and make further suggestions.

My favorite recipe sites are:

· http://www.epicurious.com/

This site is where all of the recipes for Bon Appetit and Gourmet Magazine are stored. They allow you to rate and comment on all the recipes. When a picture is available from the magazine they post it.

·
http://www.recipezaar.com/
This is a recipe community where people post their recipes and pictures. Then everyone can try them out and rate and comment. And, they give you all the nutritional information. That’s cool!

·
http://www.foodandwine.com/recipes/
A sophisticated collection of recipes. I just started hanging out here, and subscribing to the magazine. The only bummer is that you can’t rate the recipes. But I think they are trying to stand apart and I respect them for it.

·
http://allrecipes.com/
A friendly recipe community. People post their recipes, others comment, rate, and even add their own photos of the finished product.

There is one other site that used to be a favorite. I’m posting it here with a warning:


http://www.cookinglight.com/cooking/
I’ve been subscribing to Cooking Light for many years now. Recently, however, their online collection has been merged with their sister magazine, Southern Living. I don’t like that. If I’m searching for Cooking Light recipes, I don’t want the high fat and calorie recipes of Southern Living coming up in my search. If I wanted that, I’d go to their site. So all be warned. I am visiting this site a lot less often since they changed it.

reade more... Résuméabuiyad

Scallops with Asparagus


This is a perfect spring dish. It’s light, it’s green, it’s got sweet cream butter, which is yellow like the sunshine. It’s only got a few ingredients and it’s fast and easy to prepare, leaving you with more time to enjoy the extra sunlight. And the best part, it tastes terrific!

I think the last scallop dish I prepared was so good, that I had to find more I could do with scallops. When they are fresh, they are sweet and perfect little mouthfuls.

My first stop on the Internet in my scallop recipe search was Epicurious (
www.epicurious.com). And that was my only stop. In fact, I now have a backup of scallop recipes I want to try.

This recipe, in particular, caught my eye. It’s a good contrast to the last scallop recipe I tried which had a sauce base of crème fraîche. And the asparagus is an early spring vegetable, which is perfect today, the first whole day of spring.

A lot of the changes that I made to the recipe came from the suggestions of the people who had already tried the recipe and wrote their comments on Epicurious (one of the reasons that I love that Website).

I eased up a bit on the amount of oil, and cut back a good deal on the original ½ stick of butter that was called for. I also used slightly less wine, but if I were to make it again, I would probably use the entire 1/3 cup. I don’t know why I stopped at a ¼ cup. Well, maybe it’s because I love vinegar, and with slightly less wine, there would be a slight bit more vinegar in proportion. Oh, and I doubled the sauce to scallop ratio. I like having extra sauce (which was described as a form of beurre blanc).


Scallops With Asparagus

Adapted from Gourmet Magazine


1 lb medium asparagus

2 tablespoons olive oil
1 lb large sea scallops (tough ligaments removed from their side, if attached)
salt and pepper to taste
1/4 cup dry white wine

2 teaspoons white-wine vinegar
1-2 Tbs. unsalted butter, cut into tablespoon pieces

Trim asparagus, then cut stems into 1/4-inch-thick diagonal slices, leaving tips whole.


Heat 1 tablespoon oil in a heavy nonstick skillet over moderately high heat until hot but not smoking, then sauté asparagus, stirring occasionally, until just tender, 5 to 6 minutes. Transfer with a slotted spoon to a plate, reserving skillet off heat (do not clean).

Pat scallops dry and sprinkle with pepper and salt. Add 1 tablespoon oil to skillet and heat over moderately high heat until hot but not smoking, then sauté the scallops, turning over once, until browned and just cooked through, 4 to 6 minutes total. Transfer scallops with tongs to another plate and cover it to keep it warm.

Carefully add wine and vinegar to skillet (mixture may spatter) and boil, scraping up brown bits, until liquid is reduced to about 3 tablespoons, about 1 minute. Add any scallop juices accumulated on plate and bring to a simmer.

Reduce heat to low and whisk in butter, 1 tablespoon at a time, until incorporated.

Enjoy!

reade more... Résuméabuiyad

A Memorial Cheese Tattoo


Who ever would have thought they'd see a tattoo post on a food blog?

Here it is, folks. A memorial cheese tattoo. And I have to say that I think it's totally cool!

LA Ink is on TLC with new episodes on Thursday nights. With each tattoo they do on the show, the owner of the tattoo explains the story behind it. The tattoos that end up on air are usually emotional, as was this one.

This nutty looking guy (with a personality to match) who looked like he stepped right out of 1978 asked Kim to do this tattoo. The story behind it was interesting. If I remember correctly, he worked at a supermarket and he was hit by a car behind the store one day. The crash crushed his small intestines and he had to have 19 inches of intestines removed.

Well, his favorite food was cheese, but the operation left him lactose intolerant. So he decided that somehow it would help him to see this memorial tattoo on his inner arm. Personally, I think it would only make me want it if I always saw it on my arm, but that's just me.

This guy was a complete barrel of laughs and they showed several photos of him posing with cheese. I was cracking up. It was quality entertainment.

By the way, this was not his only food tattoo. He also had a cute little cheese taco on his calf.


reade more... Résuméabuiyad

Matzo Brei


I'm all about the Matzo right now!

It's that time of year, when the International isle of the supermarket is chock-full of matzo. I was drawn toward my semi-annual box of Streitz.

Let me just say, I had a little quandary as I selected it. I will share it with you - I felt ripped off. One box of Streitz matzo (lightly salted) cost $3.29. But two isles over, where the seasonal stuff is, a package of six boxes of another brand was only $3.99.

I started out putting the single box in my grocery cart. I know that I'm the only one in my home who will eat it (Joe is doing Weight Watchers). But when I saw the large packages for just 70 cents more, I put the individual box back and loaded the jumbo pack into the cart.

But then my brain started telling me to go back to the original box. What on earth will I do with 6 boxes of matzo? I don't know that within the box the matzo there is plastic to keep it from getting stale. In fact, I do know that the box of Streitz doesn't plastic-wrap the matzo.

So I went back to the International isle and got the single box back. But I felt so gypped at the same time. Yet I know it was the right thing to do.

I love matzo. Did I mention that? I like it plain, with butter, with butter and jelly, with cream cheese, with cream cheese and jelly, and cooked up as matzo brei.

Matzo brei is a simple thing. This is the way I've always made it:

Ingredients

  • 1 piece of matzo
  • water
  • 2 eggs
  • 1 Tbs. milk
  • salt & pepper to taste
  • sour cream

Remove a big, square piece of matzo from the box. Trust me, when I say to run it under the tap in your sink. It needs to be softened some with liquid. You don't want the matzo to be mush, and running it under the tap won't do that. I don't soak it, I simply get it wet.

Break the matzo into small peices. Mix those small pieces in a bowl with the 2 eggs and the milk. Season it to taste with salt and pepper.

I like my matzo brei to be separate pieces, so as soon as I drop it into the hot pan (on medium-high), I begin moving it around with the spatula. If you don't do that, it will all cook together like a cake. I am sure that some people like it that way as well. It's a matter of preference.

Serve with sour cream.

reade more... Résuméabuiyad

Carrot Cake Cupcakes ♥

Carrot cake flavor with perfect cupcake texture
Today's recipe: A cupcake adaptation of a Cook's Illustrated recipe for carrot cake. Light crumb, lightly spiced. Excellent cream cheese frosting.

People, as if we need one more reason to share our very best recipes, it's this: should we lose a recipe, we can call to ask, "By chance, did I give you my carrot cake recipe?" and then sigh with relief when hearing, "Yeah! It's our favorite."

My sad story: I've lost my carrot cake recipe. It wasn't even my recipe, it was my grandmother's, the carrot cake recipe she made for my 17th birthday the year it was just the two of us, the carrot cake recipe I made for her 80th birthday when family gathered from all over the country, the carrot cake that I made, after she died a few months later, year after year after year to commemorate her birthday, delivering fat squares to friends, neighbors and in her special memory, elderly acquaintances, often to huge surprise and delight.

I've searched high and low. I've called family and friends. It was hand-written on a smudged-up 3x5 orange index card, wrapped in a plastic sleeve. The flipside includes notes on each year's deliveries and details my own 'secret technique' for moist, flavorful carrot cake. I even remember the last likely time I made it: in 2001, when my parents were here on Gramma's birthday.

My sister doesn't have it. My cousins don't have it. For some reason, it didn't make the family cookbooks on either side and it's not in the church cookbooks I've contributed to. I fear it's lost forever - a special shame since as 100s of thousands of visitors to A Veggie Venture and KitchenParade.com can attest, I am hardly, what shall we say, stingy? with good recipes.

I'm sad, teary even. Sure, everyone has a decent carrot cake recipe. And the lost recipe may not have been so special except that it was particularly mine, my grandmother's, the one we shared. And I want it back! And I especially wanted it, now, to share with Danielle from Habeas Brulee who's collecting stories and recipes for her "Sweet Gifts" edition of Sugar High Friday.

Instead, I'm sharing Cook's Illustrated's 2003 recipe for Simple Carrot Cake with Cream Cheese Frosting, adapted for cupcakes. Luckily, it's a great carrot cake recipe -- it's just not mine. But you? It can be yours. And if it does become yours, won't you please be sure to share it?

Oh, and the excellent cream cheese icing that comes from Cook's Illustrated recipe? It's now mine, too, the one I'll put on Gramma's carrot cake, should I ever ever ever be lucky enough to find my recipe. (Why? It's slightly lighter, in texture, flavor and calories, than most cream cheese icings, the result of less butter. Be aware, however, that it doesn't harden.) If I do, you'll be the first to know because no matter what, I'm sharing it with the world.


VEGETABLE RECIPES from the ARCHIVES
~ more Baking with Vegetables recipes ~

CARROT CAKE CUPCAKES

Cook's Illustrated's inspiring recipe fills a 9x13 pan. To make a dozen cupcakes, I cut this recipe in half. Half would also work for 9x9 pan.

Hands-on time: 65 minutes (for cupcakes, less time for 9x13)
Time to table: about 2 hours
Makes a 9x13 cake or (halving the ingredients below) 12 cupcakes

CAKE
2-1/2 cups flour, fluffed to aerate before measuring (see KITCHEN TIPS)
1-1/4 teaspoons baking powder
1 teaspoon baking soda
1-1/14 teaspoon cinnamon
1/2 teaspoon nutmeg
1/8 teaspoon cloves
1/2 teaspoon table salt

1 pound carrots, peeled and trimmed

1-1/2 cups sugar
1/2 cup brown sugar
4 large eggs
1-1/2 cups vegetable oil (or canola or safflower)

Preheat oven to 350F. For 9x13, spray pan with cooking spray. Line the bottom with parchment, then spray the parchment. (This seems to be able to lift the entire cake out of the pan. To just cut pieces right in the pan, I think you could safely skip this step.) For cupcakes, grease muffin tins well. (I used vegetable oil and the cupcakes were quite sticky. Next time I'll use Baker's Joy or use cupcake papers.)

Measure the dry ingredients into a large bowl.

With a food processor (see KITCHEN TIPS), grate the carrots, transfer to another dish. Add the sugars and eggs to the food processor and process for 20 seconds. With the food processor running, pour the oil into the food processor in a slow stream, then process for another 20 seconds. Stir this mixture and the carrots into the dry ingredients until no flour streaks remain.

Pour into prepared 9x13 or muffin tins. For 9x13, bake for 35-40 minutes (rotate half-way through) or until a knife inserted in the center comes out clean. For cupcakes, bake for about 30 minutes. For 9x13, let cool to room temperature. For cupcakes, let cool about 10 minutes, then remove from tins. For 9x13, Cook's Illustrated suggests inverting the cake onto a wire rack, peeling off the parchment, then inverting onto a serving plate.

Spread icing over top.

CREAM CHEESE ICING / CREAM CHEESE FROSTING
8 ounces cream cheese, softened but still cool (I used Neufchatel, the reduced-fat cream cheese)
5 tablespoons unsalted butter, softened but still cool (see KITCHEN TIPS)
1 tablespoon sour cream (loved this addition!)
1/2 teaspoon vanilla
1-1/4 cups powdered sugar (also called icing sugar, confectioner's sugar, it's the white powdery stuff)

In the food processor (washed), mix the cream cheese, butter, sour cream and vanilla til smooth, wiping down the sides as needed. Add the powdered sugar and process til smooth, just a few seconds. NOTE: Half the icing was more than enough for a dozen cupcakes.


KITCHEN NOTES
Nearly all my recipes for baked goods read, xx cups flour, "fluffed to aerate before measuring". This is because flour packs down from its own weight, fluffing the flour makes a huge difference in the ultimate lightness of baked goods, pancakes, biscuits, etc. Today I fluffed the flour before measuring it, then weighed it to compare with Cook's Illustrated weight information. The two were 100% in synch. It's one more reason to invest in a kitchen scale.
I used the 'standard' size muffin tins and the batter came up a little higher than preferred, creating a 'cap' that made it harder to remove the muffins. Next time I'll use the next size up or only fill the muffin cups half-full versus 2/3 full.
What if you don't have a food processor? A hand grater works just great for carrots. But this recipe uses a food processor to mix the sugars, eggs and oil -- and Cook's Illustrated's notes say that this is a critical step, that emulsifying the sugar, eggs and oil disperses the fat throughout the mixture, so it doesn't sink to the bottom, creating a heavy, soggy, bottom.
I let the cream cheese and butter warm up a bit in the food processor while the cupcakes baked.
Leftovers should be refrigerated.


PRINT JUST A RECIPE! Now you can print a recipe without wasting ink and paper on the header and sidebar. Here's how.

NEVER MISS A RECIPE! For 'home delivery' of new recipes from A Veggie Venture, sign up here. Once you do, new recipes will be delivered, automatically, straight to your e-mail In Box.


Eat more vegetables! A Veggie Venture is the home of Veggie Evangelist Alanna Kellogg and is the award-winning source of free vegetable recipes, quick, easy, and yes, delicious. Start with the Alphabet of Vegetables or dive into all the Weight Watchers vegetable recipes or all the low carb vegetable recipes. © Copyright 2008


reade more... Résuméabuiyad

Everyday Food Magazine - a contemplation

I am reevaluating a magazine subscription right now. My April issue of Everyday Food arrived yesterday with a “Last Issue Alert” included, and I’m trying to remember the last time I got excited about any of their recipes.

Did I change, or did Everyday Food change?

I’ve been getting the magazine since it’s first issue. I would hurriedly scan through it and mark the recipes that I wanted to make. Then I’d put it down and get back to it, perhaps making a recipe in the meantime. My second time through, I’d go cover to cover, examining the pages more deeply and removing the recipes that I really planned to make someday, to save them inside a sheet protector that I’d store in a big 3-ring binder of the keepers.

I know what you are thinking, just look at the title! Everyday Food! Well, duh! But for some reason, I think it is more everyday and plain Jane now than it was. I just about lost it when I saw the recipes for a romaine salad and a breaded pork chop.


Isn’t the point of getting a food magazine to learn to cook new and interesting things?

I was completely offended by the recipe for silver-dollar pancake sundaes with chocolate hazelnut sauce. When it comes right down to it, that recipe is Nutella, Biscuick, and Bryers.

Okay, I’ll admit that the whole issue wasn’t like that. They devoted a page to saffron – but only used it in one recipe. It was a basic risotto that they gave a few variations of, one of which was Milanese (with saffron). There was a beef satay, but I don’t generally eat beef. There was a cherry-lime jam, but with frozen cherries?


I guess it’s time to just let go.

reade more... Résuméabuiyad

Comfort Food: Reuben Casserole ♥ Recipe

A great way to use leftover corned beef
Today's recipe: A reuben sandwich in a casserole: leftover corned beef with sauerkraut and Swiss cheese.

Last year, when the Straub's butcher asked if I wanted the 'big' piece of Kobe corned beef for St. Patrick's Day, I was sure the 'small' would be plenty. "Are you sure? he encouraged, "It's really good." I charged ahead, "Sure, I'll take the big one."

Good advice, good decision. The Kobe beef was spectacular, moist and meaty and fork tender in my long-time favorite Corned Beef & Cabbage. The only downside to lots of meat turns out to pure upside: great leftovers. This casserole was a favorite, held over, yes, from last year. It's a keeper.

NEXT TIME
I might cook some egg noodles or add some caraway or spinach or top it all with mashed potatoes. It's a casserole: it's flexible!

Note to Vegetarians

REUBEN CASSEROLE

Hands-on time: 15 minutes
Time to table: 45 minutes
Serves 4 as main dish, 8 as side dish

16 ounces good sauerkraut (typically, this means from a jar or bag from the refrigerated section) rinsed, drained and squeezed
8 ounces cooked corned beef, diced
2 tablespoons grated onion
8 ounces Swiss cheese, grated
1/2 cup light Thousand Island dressing (how to make 1000 Island dressing)
Pepper to taste

Preheat oven to 350F. Spray 8x8 or 9x9 or pie dish with cooking spray. Mix all ingredients. Arrange in dish and bake for about 30 minutes.


A Veggie Venture - Printer Friendly Recipe Graphic


MORE St PATRICK'S DAY RECIPES
~ Whole Wheat Soda Bread ~
~ Emerald Isle Stew ~
~ more St Patrick's Day recipes ~
including lots of 'green food' for last-minute festive supper ideas
~ more sauerkraut recipes ~
~ more casserole recipes ~


NEVER MISS A RECIPE! For 'home delivery' of new recipes from A Veggie Venture, sign up here. Once you do, new recipes will be delivered, automatically, straight to your e-mail In Box.


Eat more vegetables! A Veggie Venture is the home of Veggie Evangelist Alanna Kellogg and is the award-winning source of free vegetable recipes, quick, easy, and yes, delicious. Start with the Alphabet of Vegetables or dive into all the Weight Watchers vegetable recipes or all the low carb vegetable recipes. © Copyright 2008


reade more... Résuméabuiyad

Scallops and Beets and Creme, Oh My!


I just had to add this new photo (above) to the original post I did. This photo comes from the 3rd time I made the dish. The old photo (below) is inferior - it's just not as pretty. But I will leave it here since part of the post talks about the ingredients.


This recipe comes from Food And Wine Magazine (April 2008)


I’m hoping that this blog encourages me to experiment more in my cooking. I did just that when I made this next recipe. It is another recipe that comes right out of this month’s edition of Food and Wine Magazine. I made it as it is presented on page 67 (and it’s online as well). There were no pictures to go with this recipe, so now there are.

Borscht inspired this chef to create this recipe. I’ve never actually had borscht, but I remember watching my grandfather eat it when we used to visit. He was a Russian immigrant. I’ll admit, I was rather grossed-out watching him eat the funky purple stuff. It looked like a purple version of Pepto Bismol. But now, in my forties, it looks appealing.

What exactly do this dish and borscht have in common? The beats, the lemon, the onion (or in this case, shallot), and the sour cream (in this case crème fraîche).

I’ve made this dish twice now. The first time it was a deconstructed version. I made the beets one night. And they were so good, that I ate them all before I got around to buying some scallops. I never made the “salad,” I just ate them plain and cooled. Fresh beets are so good!

Then, two nights later I made the rest. I got huge, fresh sea scallops. They were expensive, and I only bought three. One of them didn’t make it into this picture:


Then, I went to make it again. After all, I still had crème fraîche, lemon, and scallops. And I was more than happy to get the beets and scallops again. Too bad the huge ones weren’t available, so I got the medium sized scallops instead.

Not only is this recipe a delicious one, but it is easy to make. There are really few ingredients. And you can roast the beets days beforehand. They don’t go bad so quickly! And the sauce and the scallops are ready in minutes.


Seared Scallops with Beet Salad and Horeseradish Cream


1 pound large unpeeled beets, cut into 1-inch wedges
Salt and freshly ground pepper
1/2 cup water
1/4 cup plus 2 tablespoons extra-virgin olive oil
1 tablespoon raspberry vinegar
1 small shallot, minced
1 tablespoon drained prepared horseradish
1/2 cup crème fraîche
1 teaspoon fresh lemon juice
12 jumbo scallops (about 1 pound)

Preheat the oven to 375°. Put the beet wedges in a medium baking dish, season with salt and pepper and add the water. Cover the dish tightly with foil and bake for about 1 1/2 hours, or until the beets are tender. Let cool slightly.

Peel the roasted beets and transfer to a food processor. Pulse several times, just until coarsely chopped. Transfer the chopped beets to a bowl and stir in 1/4 cup of the olive oil, the raspberry vinegar and a pinch each of salt and pepper.


In a small skillet, combine the minced shallot with the horseradish, crème fraîche and lemon juice and season with salt and pepper. Cook over low heat, stirring occasionally, just until the crème fraîche is melted, 1 to 2 minutes. Keep the sauce warm over low heat.

Meanwhile, in a large skillet, heat the remaining 2 tablespoons of olive oil until nearly smoking. Using a paring knife, score a shallow crosshatch pattern into one side of each scallop. Season the scallops with salt and pepper and add them to the skillet, scored side down. Cook over high heat until the bottom is browned, about 3 minutes. Turn and cook until the scallops are lightly browned on the second side, and just cooked through, 1 to 2 minutes; don’t let the scallops become opaque.

Spoon the roasted beet salad onto plates and top with the seared scallops. Drizzle the warm horseradish cream all around and serve right away.

reade more... Résuméabuiyad

Rice Cookers

When I started making sushi and semi sushi I decided to invest in a rice cooker. I had flashbacks to my old college days. They used to kick us out of the dorm during the summer and leave us to find housing off campus. One summer I roomed with three Japanese students. It was funny because each of them had their own separate rice cooker, and they sat on a buffet table in the dining room, constantly plugged in. At the time, they didn't have digital readouts like this. They each had little lights on them, and I'd look at them in the dark room and they looked like little space orbs. They kept the rice at the perfect serving temperature all day long.

These days, that kind of rice cooker looks like this:


These rice cookers can cost several hundred dollars. But I wasn't up to spending that kind of money.

I did a little bit of research on rice cookers. They say to make sure to get one that is nonstick and that has a removable pan so that you can clean it easily. I ended up buying this rice cooker:

It was only about $31 on Amazon and it's nice and small (holds 3 cups of rice). It got good ratings. I've used it quite a bit now and it's perfect.

It makes cooking the rice so easy. It comes with a cup measure. Then you don't have to measure the water. You just put the inside pan under the faucet and fill it to the appropriate mark on the inside wall which is based on how much rice you are cooking.

Then you just click the button and 20-30 minutes later you have perfectly cooked rice.

reade more... Résuméabuiyad

Spicy Tuna Roll


I love a spicy tuna roll. But it can get expensive ordering them as take out. Plus, living in the boonies, I have to drive far to reach any sushi restaurants that I would order from. So I decided to learn to make it on my own.

Luckily, I have a great fish market one town away. They have good prices and nice fresh seafood. It's also a restaurant, so someday, I'll have to go and get some steamers or fried clams. I digress.

If you want to learn to make sushi - especially if you want to actually see how to roll it, I recommend viewing this video in addition to reading the rest of this post: http://video.about.com/japanesefood/Spicy-Tuna-Roll.htm


I'm hoping to educate my readers on making sushi, so I'm going to start with the fish itself. Here's a picture of the tuna steak I bought yesterday:


When I order the fish at the counter, I ask for sushi grade tuna. This steak was 1/3 pound. It was enough for a good-sized roll with plenty of tuna in and on top of it. I also asked the fishmonger to cutt off the skin. Don't expect that they will do that until after they have weighed the fish. That dark spot is a blood vessel and it needs to be cut out.

Speaking of cutting, the knife is important. Don't attempt to try to make sushi with the steak knives you bought at Target! You need good, sharp knives.


Sometimes I watch a show called Shopping with Chefs on Bravo. Just today, they were shopping for sushi knives. They had a lineup of about 7 knives. They began with one that cost $140.00. Can you believe that??? They ended with a $50.00 knife and then on the screen said that a beginner could get one for $40.00 that would do the trick. But I don't have a real sushi knife. I have a set of Wustoff Trident knives that I got from my brother for a wedding gift. I use those knives to cut the fish and the finished sushi rolls.

The first thing I did was I sliced several thin slices from the nicest area of the steak. I sliced them on a slant, going against the grain. I then set them aside to save as a garnish. Each piece will have a pretty slice of raw tuna on top.


The only other ingredient I use that I can't get in the local grocery store is the Japanese style mayonnaise. I order it from Amazon. In the recipe below, I've linked to the products so people can order them online, or at least see a picture.


Here’s my recipe.

Spicy Tuna Roll


1/3 pound sushi grade tuna
1-2 scallions, chopped very finely
1 heaping Tbs. Japanese style mayonnaise (I used
Kewpie brand)
1 teaspoon
Sriracha hot chili sauce
1 sheet nori
prepared sushi rice (recipe at end of this post)


Chop up the tuna into a small dice. Put it in a bowl. Add some of the scallion (perhaps the lower part of the scallion that is whiter, while saving the green for garnish).


In a separate bowl mix the mayonnaise and Sriracha. Taste it to make sure that you have added the right amount of Sriracha for your taste. When it’s ready, pour it into the tuna and scallions and mix it up.


Cover the sushi-rolling mat with plastic wrap. This will keep it nice and clean. Once you roll your sushi, you just throw away the plastic and store the mat.

The sheets of nori that I have are large, and I noticed that in the video I linked to earlier, the sheet of nori is much smaller. So I removed the top 1 ½ inches from the nori.

Spread the rice out and press it into the sheet of nori. The moisture in the rice will glue it to the nori.

If you want an inside-out sushi roll (like the one in my picture), then flip the sheet of nori with the rice pressed into it so that the rice side is face-down.


Here's what it looks like head on:


Here's the view from above:


You can see my pictures of rolling a different kind of sushi in this post:
http://mylittleworldoffood.blogspot.com/2008/03/recipe-meryls-surimi-maki-sushi.html

Roll the sushi and cut it. I like to cut into eight pieces, personally.

You could serve this sushi in two different ways. One way is to stop here and simply display them like this with the cut sides facing up:


But I wanted to do it the way my favorite restaurant does it. Lay the cut pieces on their sides. Top with the nice slices of sushi that you saved from earlier.
Top with the beautiful slices of tuna and the chopped green part of the scallions. Serve with wasabi and soy sauce.


Sushi Rice

I cook one cup rice according to directions.I empty the rice pot into a bowl. While it’s still hot, or after it’s cooled some, I add:

1 ½ Tbs. rice vinegar
1 Tbs. sugar

Mix well and let the rice cool, covering it to keep it moist.


reade more... Résuméabuiyad

Swedish Pickled Beetroot Salad ♥

Our favorite dish from Christmas dinner, beautiful with ham
Today's recipe idea for a quick Easter vegetable: Pickled beets and orange slices in a light mayonnaise, sour cream and horseradish sauce. Traditional Scandinavian Christmas food. Bright pink in color!

This easy beet salad was one of three favorite new recipes last Christmas. It works so beautifully with ham, it's already on the Easter menu.

The combination of beets, sour cream and horseradish makes it much like Borscht Beets but this is special (better? perhaps!) because of the extra spark from pickled beets and the texture/flavor/color contrast from orange slices (or apples, as in the inspiring recipe from Karin at the great Swedish food blog, My Recipes).

WHERE TO FIND PICKLED BEETS? Our Christmas salad used up the last of some homemade pickled beets butcommercial pickled beets are found alongside canned beets in the canned vegetable aisle at the grocery. I also supplemented the homemade pickled beets with my favorite (and inexpensive) refrigerator pickle Swedish Beets (which, please be aware, must be refrigerated at least 24 hours before eating or using in this salad) and there was no telling the difference.


MORE FAVORITE BEET RECIPES
Once beets are cooked, they make up into salads in minutes. Some favorites include:

~ Beets with Feta, so simple, so delicious it turns non-beet people into beet lovers! ~
~ Beet & Walnut Salad, a supper salad ~
~ Beet Carpaccio, looks so beautiful on a plate ~

~ more beet recipes ~

~ one year ago today Birdseye frozen vegetables with trans fat, except, good news, a reader has written that the transfats are gone! ~
~ two years ago today Mâche with Orange Cumin Dressing, a lovely simple salad dressing recipe ~

SWEDISH PICKLED BEETROOT SALAD

See Karin's inspiring recipe, some richer for those who tend that direction!
Hands-on time: 20 minutes
Time to table: 20 minutes (can be made ahead by a few hours)
Serves 4

1/4 cup mayonnaise (I used Hellman's Light, my favorite mayonnaise)
1/4 cup sour cream with a splash of lemon juice (I used this to substitute for Karin's crème fraîche)
1 tablespoon grated horseradish (I used a homemade grated horseradish that was quite hot, you might need to adjust for this)
1/2 tablespoon yellow onion, grated small with a cheese grater
6 pickled beets (homemade or commercial)
1 or 2 oranges, with peel sliced off, then the orange cut into bite-size slices (Karin uses sourish apples such as Granny Smith, I really loved the contrast of the dense beets and moist orange sections)
Salt
Pepper
Lemon Juice
Garnished with pickled herring (my addition)

Whisk together the mayonnaise, sour cream, horseradish and onion. Season with pepper, lemon juice. Taste the sauce and adjust as needed. Cut the beets into pieces, prep the oranges and stir into the sauce. Taste and adjust as needed. Garnish if you like. Refrigerate until serving but bring it out to come to room temperature beforehand. NOTE: If you prefer 'lightly dressed' beets, this sauce could handle quite a few more beets.


PRINT JUST A RECIPE! Now you can print a recipe without wasting ink and paper on the header and sidebar. Here's how.

NEVER MISS A RECIPE! For 'home delivery' of new recipes from A Veggie Venture, sign up here. Once you do, new recipes will be delivered, automatically, straight to your e-mail In Box.


Eat more vegetables! A Veggie Venture is the home of Veggie Evangelist Alanna Kellogg and is the award-winning source of free vegetable recipes, quick, easy, and yes, delicious. Start with the Alphabet of Vegetables or dive into all the Weight Watchers vegetable recipes or all the low carb vegetable recipes. © Copyright 2008

reade more... Résuméabuiyad