I swear that this is (probably nearly) the last post for things made in 2011, but it's a great dish that we made for our 2011 New Year's Eve dinner. We'd been planning to make this pork loin roast since October 2011 when Lynn saw it in Bon Appetit. None of the components are difficult for the pork loin but there was a serious error in the original recipe when it came to cooking temperature and time - which I address in the recipe's head notes after the jump.
Fortunately, others had gone before and there was very good information in the reviews. Ours looked like the roast in the magazine's picture and tasted like something you'd gladly open your wallet to pay for in a restaurant. It was all kinds of awesome.
A pork loin is butterflied, a layer of pre-wilted kale is spread on top, and on top of that a mixture of pork sausage, reconstituted dried mushrooms and apples, thyme and rosemary. The loin is then rolled and wrapped in a layer of prosciutto, tied and garnished with rosemary, browned briefly and roasted.
 |
| I was at Sur La Table looking to buy some kitchen twine because Lynn was out. All they had were ridiculously expensive (and small) packages of kitchen twine and these re-usable silicone bands for about the same price. I have poo-pooed these in the past because tying your own roast or other cut of meat when called for is something you should know how to do. However... the bands work beautifully, are easy to remove and easy to clean. These bands wouldn't work for every application, but they were perfect for this roast. Yay, technology! |
 |
| Hello luv-ah! |

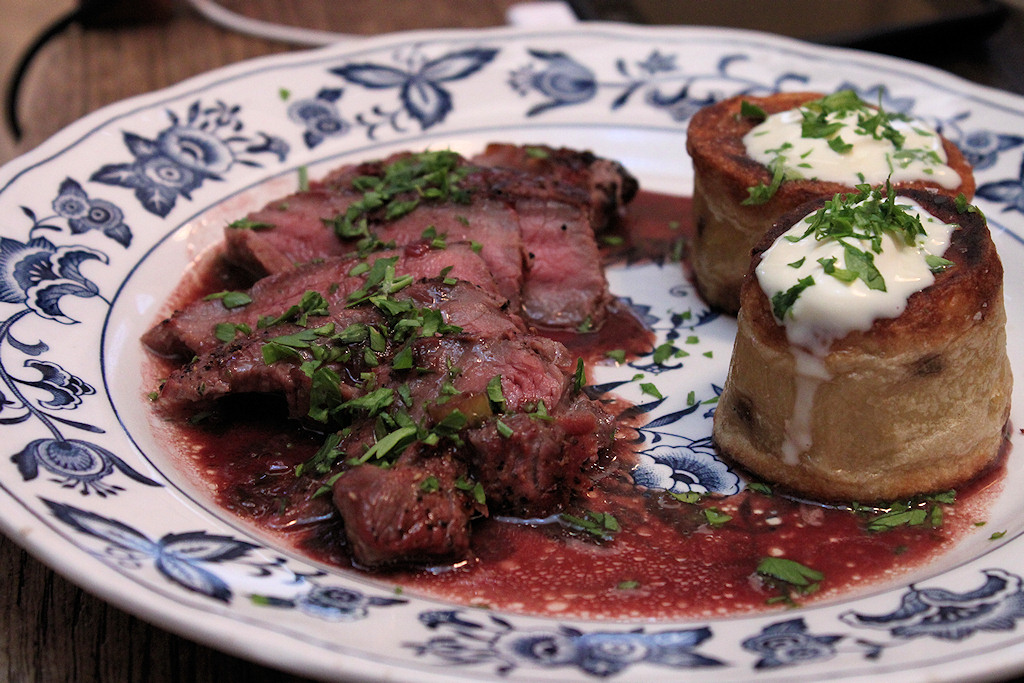
I can't figure out what to name the potatoes. The closest I've come is "French-Fried Potato Columns" (not entirely accurate and kind of uninteresting), or maybe, "Potatoes Cooked Three-Ways". Ugh. My sister Chris served these a couple of years ago for our family's Christmas Eve dinner and I've been periodically obsessing over them since then.They taste like french fries on the outside (but are not deep fried) and inside, but are approximately 2" high by 2 to 3" diameter "columns" and so there is a lot of fluffy potato in the middle. I don't eat potatoes very often and when I finally got around to asking her how she made them she didn't remember, didn't know where she'd found the recipe or even if there was a recipe. My research proved fruitless - I couldn't find anything exactly like what I remembered.
 |
| The potato "columns" drying after being boiled. After they've dried, the tops and bottoms are sauteed until they're a deep golden brown and then they're popped in the oven for about 15 minutes.. |
When we were out picking up the roast at
Tacoma Boys (on 6th Ave. - great store) and other ingedients for the 2011 Christmas Eve dinner, I cornered her in the cracker aisle and wouldn't let her leave until she'd remembered how she made them. Which she did. I made a test batch for my sister Sara's family and got a unanimous thumbs up.
.The citrus salad was all Lynn's idea: a variety of greens, grapefruit supremes, toasted pecans and avocado in a grapefruit and Sherry vinegar vinaigrette. It was a perfect balance to the rich pork.
It was truly a wonderful way to mark the end of 2011.
RECIPES (after the jump):- Roasted and Stuffed Prosciutto-Wrapped Pork Loin- No-Name Potatoes - Salad with Grapefruit, Toasted Pecans, Avocado and a Grapefruit VinaigretteStuffed Pork Loin Wrapped in Prosciutto - From Bon Appetit (October 2011)
Prosciutto-Wrapped Pork Loin with Roasted Apples - Serves 6-8
Notes: The recipe in Bon Appetit instructs you to cook the prepared pork loin at 400F for about 1 hour and 40 minutes (internal temperature of 140 F). Many reviewers indicated that this was too high and too long a cooking time. We adjusted the heat to 350 F and ended up cooking it for 1 hour 35 minutes. I checked the temperature with an instant read thermometer at 45 minutes and thereafter after 30 minutes, 20 minutes and, finally, 10 minutes where the temperature in the middle was 142 F - perfect! If you use a smaller pork loin (ours was 3.5 pound) your cooking time will vary so use the internal temperature as your guide.
Although both Lynn and I have butterflied meat enough to be comfortable doing it ourselves, I asked a butcher at my go-to meat market (
Golden Gate Meat Company at the Ferry Plaza) to butterfly it for me. If you do it yourself, it's not hard, it just needs your attention. I know there are videos out there to be watched. Try to keep it at least 1/2" thick as you cut and unroll it. A little thicker it okay - you're going to pound out the thick parts after you butterfly it. Hone your knife first. I like using a boning knife or a 6" not-too-wide chef's knife for this.
I would definitely add some sauteed and caramelized mushrooms to the filling next time and any juices from de-glazing that pan to the liquids for the roast. I think there would be more shroom-y flavor. Another addition I'd consider is to dice a little prosciutto and use the rendered fat to cook the onions, adding the cooled prosciutto bits to the stuffing - but this dish is delicious as written.
Ingredients - Filling- 1 ounce / 1 cup dried porcini mushrooms (you could substitute shitakes)
- 2 ounces / 3/4 cup dried apples
- 1 lb kale, washed with stems removed (check this out for an easy method to de-stem kale)
- 2 teaspoons kosher salt + more
- 2 tablespoons unsalted butter
- 1 cup medium minced onion
- 1 tablespoon finely minced garlic
- 1 1/2 teaspoons dried thyme
- 1 1/2 teaspoons dried crumbled rosemary
- 2 tablespoons brandy (or Calvados)
- 1/2 teaspoon freshly ground black pepper
- 1 lb ground pork
Ingredients - Pork Roast- 1 trimmed 3.5 lb pork loin, butterflied
- 1 teaspoons kosher salt + more for seasoning
- 3 ounces thinly sliced prosciutto
- 5 sprigs of rosemary
- 4 medium apples (we used Fuji's, but Granny Smith would work, too), quartered. If small, just cut in half and core out the seeds with a melon-baller or a 1-teaspoon measure.
- 3 tablespoons unsalted butter, divided
- 2 tablespoons extra-virgin olive oil
- 1 cup hard, dry cider
- 1/2 cup low-sodium chicken stock or broth
Preparation - FillingPlace the dried mushrooms and dried apples in separate heat-proof bowls. Add 1 cup of boiling water to each bowl. Let the mushrooms and the apples soak until very soft, about 1/2 hour. Drain mushrooms and reserve the soaking liquid and make sure that when you pour it off, you leave any grit from the mushrooms in the bottom of the soaking bowl. Drain the apples and discard the soaking liquid. Finely chop the mushrooms and apples. Combine in a small bowl and set aside.
Place the prepared kale in a large microwave-safe bowl or Pyrex baking dish. If your kale has dried off completely after being washed, toss it with a little water. Microwave it on high one minute at a time, tossing with tongs until the kale it wilted - about 3-4 minutes total. Drain off any excess water and refrigerate until cool.
Heat a large skillet over medium heat, add the butter and when the milk solids have stopped foaming add the onion until it's software and just golden brown. Add the mushrooms and apples. Cook about 1 minute, stirring occasionally - about 5 minutes. Stir-in the garlic, thyme and rosemary and cook for 1 minute. Take the pan off of the heat and add the brandy. Return the pan to the head and cook until the liquid is fully absorbed and reduced, about another minute. Taste. Add about 1 teaspoon salt and 1/2 teaspoon pepper and combine and cook for another 30 minutes. Re-taste and add the remaining teaspoon salt if necessary.
Transfer the mixture to a bowl. When the mixture is completely cool, add the ground pork and stir to combine well.
Preparation - PorkIf you are butterflying the pork loin: If your butcher did this for you, skip to the next paragraph. Place the pork loin on the cutting board at a 90 degree angle, with the short end facing you. Place your non-cutting hand on the top of the roast. Use a sharp knife (you did remember to hone your knife, yes?) and make a vertical cut about 1/2" above the underside of the of the loin and about 1" into the roast. Placing the tip of your knife at the cut end at the top of the cut with the cutting side of the knife angled slightly downward, and staying 1/2" above the cutting board cut another inch into the roast while gently rolling the loin away from you with your other hand. Continue this step until you've unrolled the roast into a rectangular, flat piece. If this is your first time, take a bow, or a picture, or find somebody to high-five.
Sprinkle a little water (no more than a couple of teaspoons over the surface of the meat and cover it with plastic wrap. Using a meat mallet, pound the too-thick parts so that that you have an even thickness - ideally 1/2". Remove the plastic wrap and season with 1 teaspoon of salt and 1/2 teaspoon of pepper.
Pre-heat the oven to 350F (see the head notes regarding oven temperature and timing), rack in the middle.
Stuffing and rolling the pork loin: Keep (approximately) a 1" border around the edges of the butterflied pork loin while you are adding the stuffing. Place the kale leaves on top of the loin in an even layer. Spread the filling on top of the kale in an even layer. Roll the pork tightly along the long (cut) end of the loin -but not so tightly that everything squishes out of the middle.Wrap 1 layer of of prosciutto around the roast and tie the roast securely with kitchen twine in 1" intervals. Tuck the rosemary sprigs under the twine on the top side of the roast.
If you follow these two steps the day before, you can wrap the roast and chill in the refrigerator. Take the roast out of the refrigerator before you are ready to cook it.
Cooking the roast: Place the apples in a roasting pan. Heat a large, heavy skillet (large enough to hold the rolled, stuffed loin) on medium-high. Add 1 tablespoon of butter and the oil to the skillet. Place the loin in the skillet, adjusting the heat down if necessary. Brown the pork on all sides - about 5 minutes total. You're not looking to get any serious color here, basically, you're starting to render the fat in the prosciutto so 5 minutes is fine. Set the pork on top of the apples in the roasting pan. Add the cider and 1/2 cup water to the skillet and bring this liquid to a strong simmer, scraping up the
fond on the bottom of the pan with a wooden spoon. Pour this liquid into the roasting pan and place the roasting pan into the oven.
Roast pork until the interior - tested in the center of the pork loin - reads 140F. Start checking at 1 hour. You may want to remove the apples if they're getting too squishy. For us, a 3.5 lb roast at 350F, it took 1 hour and 35 minutes to reach 140F. Your mileage may vary for a variety of reasons - oven temperature, size of your pork loin, etc. The internal temperature must be your guide.
When the roast is done, remove the pork (and the apples if you haven't already removed them) from the pan and place on a platter. Spoon off the fat from the roasting pan juices. Place the pan on top of the stove over medium high heat. Add chicken stock. Pour in the reserved mushroom juice - be sure to leave any sediment behind, and cook this liquid scraping off any fond from the bottom of the roasting pan until slightly reduced and thickened - about 5 minutes. Whisk in 2 tablespoons of cold butter in two 1 tablespoon pieces, incorporating the first before you add the second piece. Taste and season as desired with salt and pepper. Strain the sauce and slice the pork in 1/2 - 3/4 inch slices. Serve the apples and sauce along side of the pork.
Take a short victory lap and then go enjoy the dish.
No-Name Potatoes, or Potatoes Cooked Three Ways, or... - Serves 6
This is what you want for each potato piece: a column approximately 2 - 3 inches in diameter and 2-3 inches in height. No matter what, you're going to have some potato scraps left over. If, like me, you hate waste, simmer the leftover bits until tender and drain. Mash them with some salt, pepper and butter. Put them in the refrigerator covered and make some potato cakes for breakfast the next morning. The first time I made this, I used really big russets (and the russet potato is the one you want here) and was able to get 2 columns from each potato. The second time I made it - for the 2011 NYE dinner - I was using smaller potatoes that yielded 1 column each. Make a few more columns than you need in case a couple get shaggy when you're simmering them in the first step.
Ingredients:
- 12 2-3" wide and 2-3" tall columns of peeled, russet potatoes. The number of pieces you prepare and serve per person depends on the size of your potato columns.
- kosher salt
- 1/4 cup oil with a high smoke point (canola is what we used) + more
Preparation:
While you're preparing the potato columns, bring a large pot (5-6 quart size) of water to the boil. When the water comes to a boil, add 1 tablespoon kosher salt and stir. Reduce heat until the water is at a strong simmer/low boil. Using a spoon, lower the potato columns one at a time into the water. Depending on how many you're making, you may want to do this step in two batches as crowding the pan can make the potatoes shaggy (overcooked - do not want!) as they bump up against each other in the pot.
Cook the potatoes until they are just tender, or just slightly undercooked. Test carefully by slipping a long toothpick into the top, cut side. Remove each one when it's done to a clean kitchen towel-covered baking sheet to dry, cut side up. Cook the second batch if necessary. You want the pieces to be tender and the surface of the potato smooth and not shaggy (overcooked). The potatoes should sit on the cloth-covered baking sheet until they are completely dry - at least 30 minutes and up to an hour.
Pre-heat the oven to 350F, rack in the middle.
When the potato pieces are completely dry, pre-heat 1/4 cup oil in a heavy, wide (12") skillet or dutch oven (5-6 quarts) until it shimmers and you see the beginnings of a wisp of smoke or two. Using a pair of tongs, gently place one potato piece, cut side down, in the hot oil. Continue to add potato pieces to the pan, but do not crowd them or they will steam and not fry. Cook the pieces on one side, until they are a dark but still golden brown. Using tongs, gently turn and brown on the other cut side. When both cut sides are browned, remove kitchen towel from the baking sheet and place the pieces to the sheet.
When all of the potato pieces have been browned on the cut sides, brush them very lightly on the sides (the round part) with oil and put the baking sheet into the oven for 15 minutes. Check with a skewer - if you slightly undercooked them in the first step you can finish them off in the oven - and remove the baking sheet when they are done. Season very lightly with kosher salt on both sides and serve hot.
Salad with Grapefruit, Toasted Pecans, Avocado and a Grapefruit VinaigretteServes 6
I like my vinaigrette tart so I use close to a 1:1 ratio of acid to oil, with maybe a little bit extra on the oil side. You may prefer a 1:2 (or other) ratio of acid to oil so adjust to taste.
Ingredients:- 1 ruby red or pink grapefruit, supremed, with 3 tablepoons of reserved juice
- 1 tablepoon Sherry vinegar (substitute rice vinegar or Champagne vinegar)
- 30-36 toasted pecan halves (or 5-6 per serving)
- 1 large, ripe avocado
- 1 teaspoon kosher salt
- freshly ground black pepper
- 1/4 cup extra-virgin olive oil or walnut oil
- salad greens mix, cleaned in cold water and spun until completely dry.
Preparation:
Prepare the grapefruit by making supremes of the sections. I have a post
here where I included an embedded video on this process by Michael Symon (from the CHOW site). My advice is, after you cut off the peel (reserve it because you want to squeeze the juice from any pieces with fruit), cut the supremes over a big bowl to catch the juices. Squeeze the pieces of peel with with grapefruit flesh attached into the bowl as well as the pith after you're removed the citrus segments - you want all of the juice for your vinaigrette.
Place the freshly washed and completely dried salad greens mixture in a very large bowl. It's hell properly dressing a salad in a too-small bowl.
If you are going to serve immediately after the vinaigrette is made, dice (medium) the peeled and de-seeded avocado now and set aside.
To make the vinaigrette: Pour 3 tablespoons reserved grapefruit juice and 1 tablespoon Sherry vinegar in a large bowl. Add a scant 1 teaspoon kosher salt to the bowl and 1/2 teaspoon of freshly ground black pepper. Whisk until the salt has completely dissolved. Pour a teaspoon or so of the olive (or walnut) oil into the vinegar and whisk until emulsified. Pour in another teaspoon and whisk until emulsified. Continue to add the oil slowly whisking at each addition. Taste. Add more oil if it's too tart for your taste and adjust the seasoning.
Dress and garnish the salad: add the supremed pieces of grapefruit to the bowl with the salad greens. Pour 1/2 of the grapefruit vinaigrette over the salad greens and toss thoroughly with tongs so that all of the greens are lightly covered. Taste for balance of dressing to greens. Add a little more dressing and toss then taste again. You're not making soup, you're making salad and unless your preference is on the soupy side, don't pour-in all of your vinaigrette at once.
Serve the salad on chilled plates, garnishing with the diced avocado and the toasted pecan halves.