Pages

.

Mexican Cinco de Mayo Green Dinner


All of the Earth Day celebrations last past week must have had me thinking green when it came to making a Cinco de Mayo dinner. Cinco de Mayo is May 5, of course. Did you think it was the Mexican Independence Day? Many people do, but it is not!

Let me first educate you all about Cinco de Mayo in a very brief history lesson:


Did you know that for a time, Mexico was ruled by a Hapsburg prince?


In 1862 Emperor Maximillian and his wife, Carlota, were sent to rule Mexico by Napoleon III. Why, you ask? After Mexico declared its independence from Spain in September of 1810, it borrowed money from France. But when France wanted the money back, Mexico was unable to pay off the debt. So France sent troops to collect or take over.

The French had the best army in the world and it was well-equipped. When they arrived at Puebla (the capital of the state of Puebla), there was a battle in which the poor Mexican farmers made sport of the French.

Sadly, in the end, the French won the war and took over Mexico for some years. But the battle of Puebla on May 5 1862, is remembered as a day of great Mexican pride. It is celebrated not only in Puebla, but through out Mexico, and the places where populations of Mexicans live in the US.

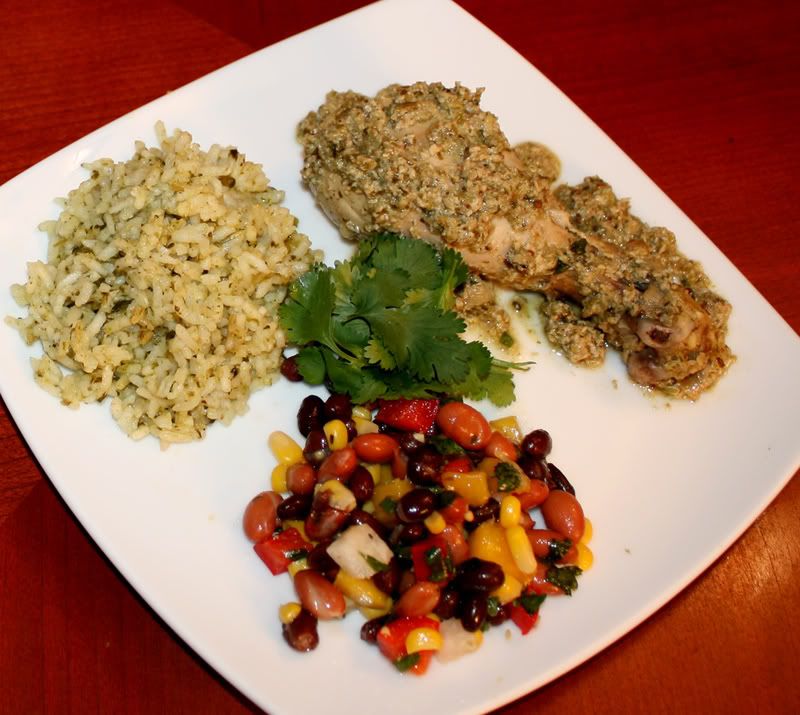
So let's celebrate the earth and Mexican heritage with a green Mexican dinner!


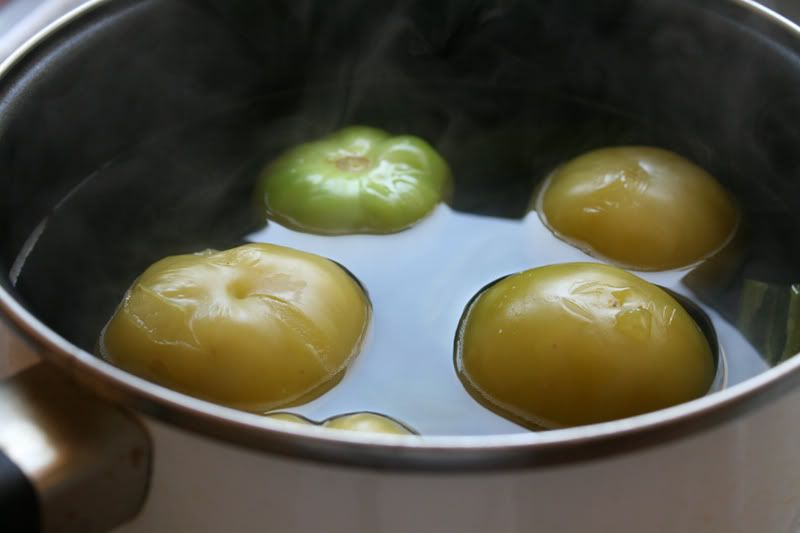
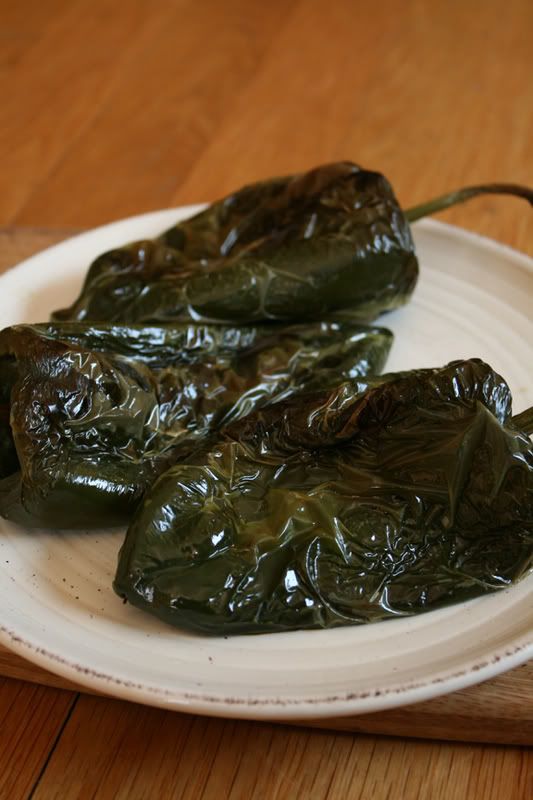
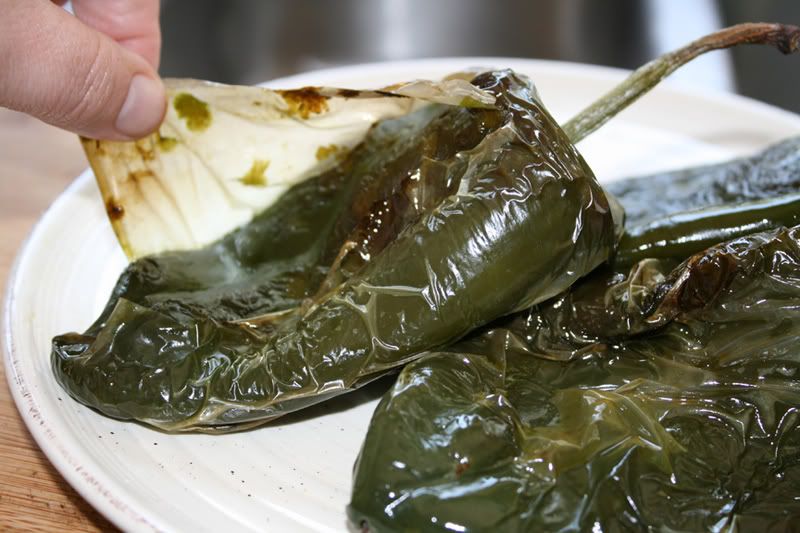
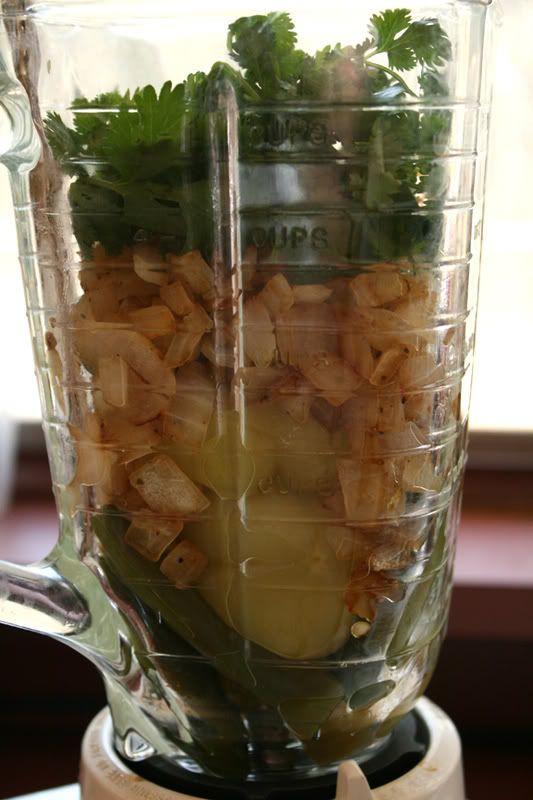
It all started out when I was at the grocery store a few days ago and found myself in the produce section where the green Mexican ingredients were begging me to buy them! I bought large tomatillos, beautiful poblano chiles (peppers), and cilantro. With ingredients in hand, I headed home to find some recipes.

Being a Spanish teacher who studied in Mexico, I have a number of good Mexican Cookbooks. I turned to
The Complete Book of Mexican Cooking by Elisabeth Lambert Ortiz. I am a huge fan of this book, which was published way back when I was just one year old. The recipes seem very traditional to me, and not too gourmet. They promote authentic Mexican Cuisine.

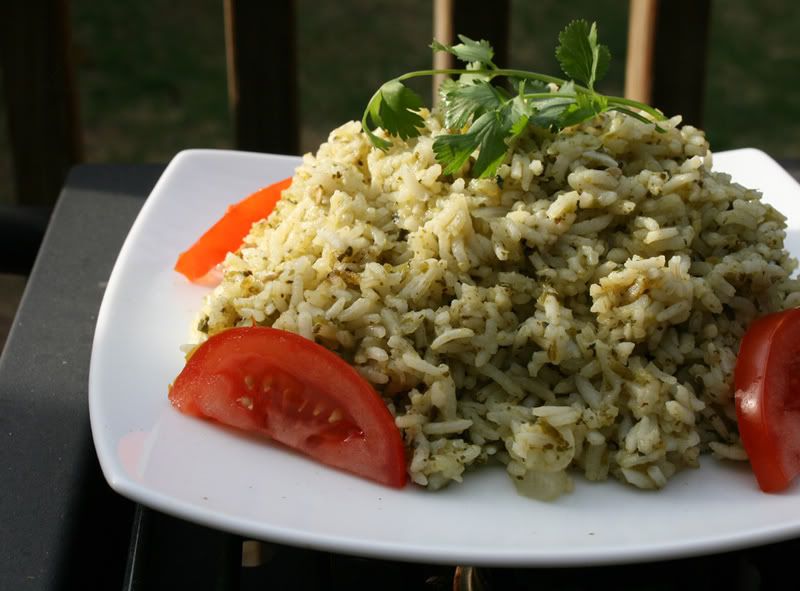
The book magically opened to Arroz Verde on page 64. Well, maybe it opened to page 64 because it is the page that I most often visit.

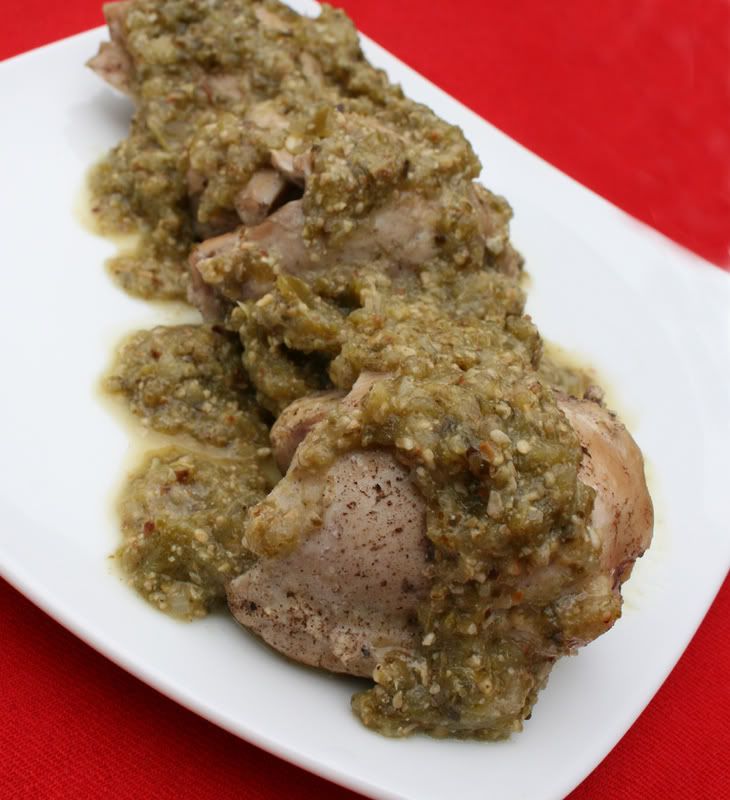
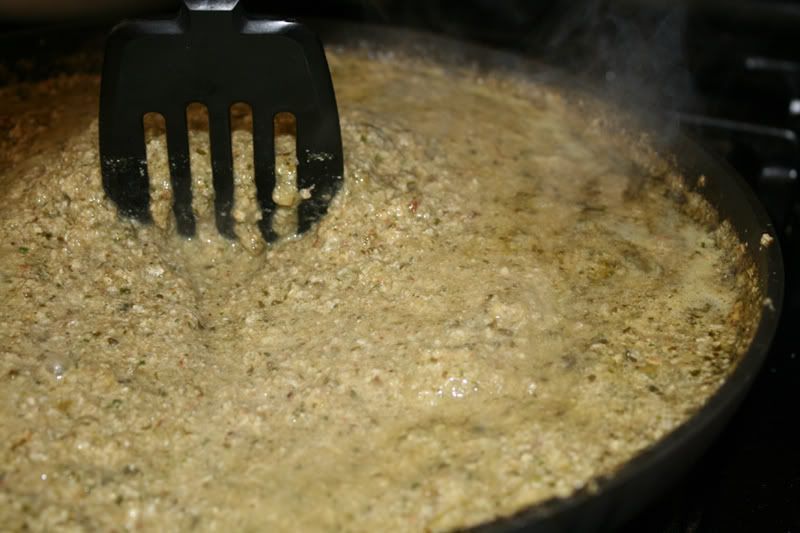
I looked at her recipe for Pipián Verde, but I had fresh tomatillos, and her recipes called for canned. I was most interested in making a Pipián Verde (a green chicken fricassee) and I really wasn’t sure of the conversion rate, so I turned to the Internet for a recipe.

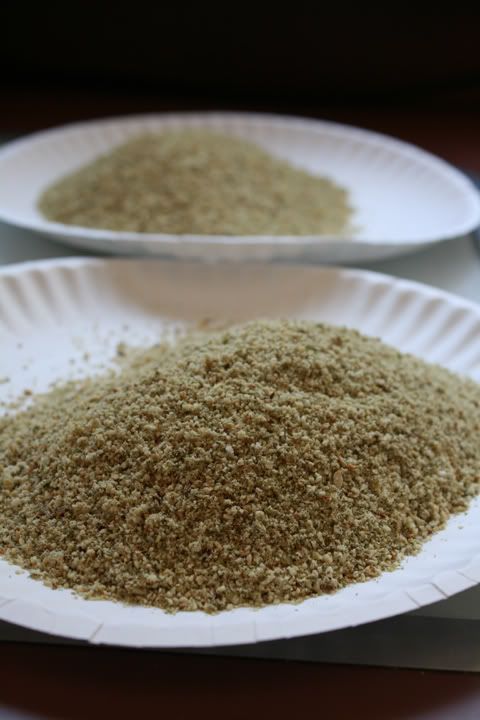
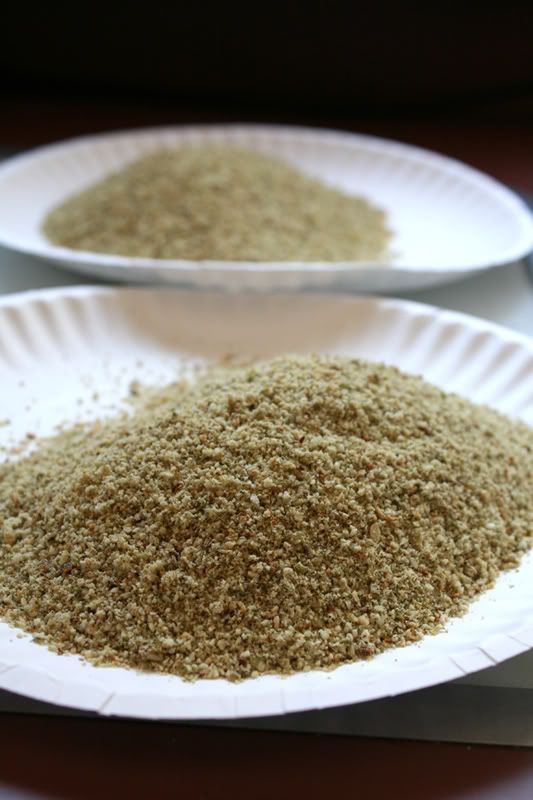
I did an advanced search on Epicurious.com for the tomatillos with the main ingredient of chicken. A recipe for Chicken in Green Pumpkin-Seed Sauce came up.
I made the chicken almost immediately and put in in the fridge, deciding to make the sauce the next day. Before going to bed later that evening, I shut down my computer.

Remembering that what I saw was a recipe for Pipián Verde, when I went to Epicurious the next day, I changed my search words to pipian verde. I clicked on the link that appeared, the only recipe they had with those words in the title.

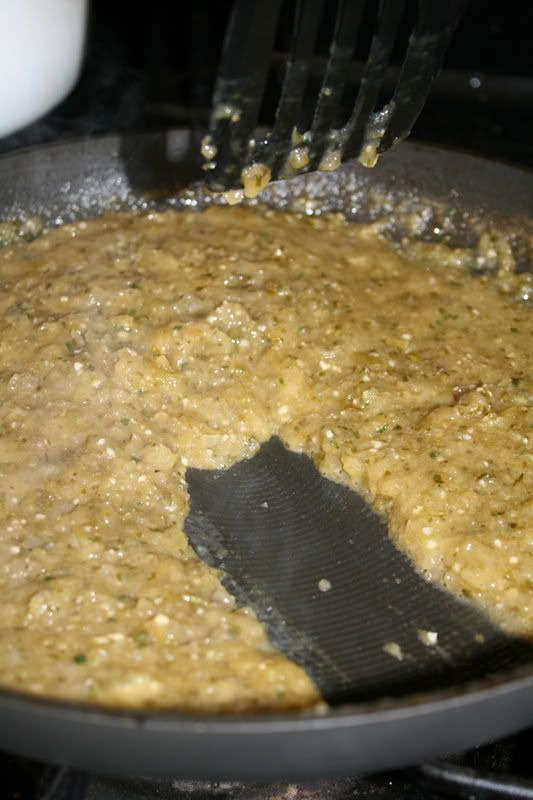
It only took a moment to realize that this recipe was different, but it looked much better than the other one. Therefore, I would use the chicken I made with the first recipe, and the sauce of this new recipe.

The result was an absolutely delicious meal that I felt I had to share. So I made a second batch of it. Then on Monday, I shared this wonderful green meal with my hard-working Spanish 3 students (there are only 13 of them) who have probably never tried food like this in their lives.

One can't expect that a bunch of teenagers are going to fall in love with traditional Mexican cooking, but I think they appreciated it, and I'm sure that a number of them really enjoyed it. They approached the new flavors and ingredients with an open mind and that warmed my heart.


reade more... Résuméabuiyad

Baba Ganoush ♥ (Recipe for Middle Eastern Eggplant Spread)

Baba ganoush doesn't often include parsley but it definitely improves the color from eggplant gray to parsley fresh
Today's vegetable recipe: Purée of grilled eggplant with garlic, lemon juice, tahini and parsley. A Middle Eastern spread or dip that's traditionally served with pita bread. Low carb. Weight Watchers 0 or 1 points.

Before I loved the garlicky, lemony taste of baba ganoush, I loved the sound of baba ganoush, pronounced [bah-bah gah-NOOSH]. Say it three times, you might love the sound too -- but it only takes one taste of baba ganoush to love how it tastes!

ALTERNATE SPELLINGS Baba ghanoush; baba bannoujh; baba-ganouj; babaganoush

This version uses grilled eggplant which adds a smoky flavor and adds parsley which brightens the color. It's a winner! The inspiring recipe from Alton Brown suggested adding sugar or honey if the baba ganoush were slightly bitter. There was no bitterness here but I so loved the idea of honey that after taking the photo, I swirled some in (not mixing it in, leaving it distinct) and -- oh swoon -- very good!

TAHINI Baba ganoush also calls for tahini, a thick paste of ground sesame seeds. It comes in a big jar and is expensive so you'll want to be able to use it in something other than baba ganoush. The other classic recipes that calls for tahini is hummus (here's the Kitchen Parade recipe for a simple hummus) but for something truly spectacular, I suggest Armenian Tahini Bread.

BABA GANOUSH

Hands-on time: 25 minutes
Time to table: 60 minutes
Makes 1 1/4 cups

1 pound globe eggplant

2 cloves garlic - next time I'll start with 1 clove
Juice of 1 to 2 lemons - I used 2 lemons, less than the equivalent of 2 1/2 lemons that Alton Brown called for; next time I'll start with the juice of one lemon, than add more depending on taste
2 tablespoons tahini - stir it well first
1/4 bunch of parsley - a small fistful, Alton Brown called for 1/2 a bunch
Salt & pepper to taste

GRILL THE EGGPLANT
Wash the eggplant but leave it whole. Prick the skin with knife tip in a few places so it won't explode. Grill for about 30 minutes, turning every 7 or 8 minutes. The skin should be blackened. When it's done, the eggplant will start to deflate. Slice off the stem end, let cool until you can handle it. Slice into the eggplant (it'll be a little messy) and scrape the flesh off the skin (a grapefruit spoon worked great). Discard the skins and any big chunks of seeds, let the flesh drain in a colander for 10-15 minutes.

In a food processor, mix the eggplant flesh with all the remaining ingredients and process til smooth. Taste and adjust to taste. Serve with pita bread or as a spread for sandwiches.


KITCHEN NOTES
NITPICKING ALTON BROWN - I just now noticed that all of Alton Brown's ingredients seemed double what seemed "right" to my taste. Perhaps this is because he used a two-pound eggplant, even though the recipe didn't say? AB, you're a rock star but some times, details do matter!
Other varieties of eggplant would work just fine, but have a higher proportion of skin:flesh so you'll need to start off with more eggplant. Here's what varieties of eggplant look like.

A Veggie Venture - Printer Friendly Recipe Graphic


DIPS & SPREADS from the ARCHIVES
~ Easy Easy Radish Spread, three ingredients plus salt & pepper ~
~ Spinach Artichoke & Bacon Dip, a classic ~
~ Beet Pesto, perhaps my favorite recipe from all of 2007 ~

~ more recipes for vegetable dips & spreads ~


Do you suffer from lachanophobia? Turn to A Veggie Venture and Veggie Evangelist Alanna Kellogg for the best vegetable recipes online. Find a quick recipe for tonight's vegetable in the Alphabet of Vegetables or plan menus with vegetables in every course. If you're a dieter, turn to hundreds of zero-point, one- and two-point Weight Watchers recipes and many low carb recipes.
© Copyright 2008


reade more... Résuméabuiyad

Pollo en Pipián Verde


Okay, I'll be the first to admit that this is not the most attractive chicken dish, but let me be the first to tell you that this stuff is awesome! It has deep flavors that present themselves in layers. And it finishes with just a little bit of heat. If I were a judge on the Iron Chef, I'd say it was like a little orchestra in my mouth! But in my own language, I'll say that it has so much flavor, and it is pure goodness on your taste buds. In fact, when I tasted it, I liked it so much that I made another batch so I could share it.

I don't make real, traditional Mexican food very often. It tends to be a bit on the labor-intensive side. But, this dish really wasn't so bad. Heck, it was almost a breeze the 2nd time I made it! Honest! And there's no reason that you can't make this over the span of two days. You can make the chicken one day, and the sauce the next day.

And if you are preparing this as your first Mexican dish, you could even do the 3-day thing.
  • Day 1: Roast and peel the poblano peppers, toast the pumpkin seeds and put them through a food processor, make the chicken.

  • Day 2: Make the tomatillo sauce (pictured in the mustard-colored bowl

  • Day 3: finish the sauce and reheat the chicken in it.
The first batch I made used the two-day approach.

But the 2nd time I made it, I sprinted through the steps and did the whole thing at once. That was cool. Being a multi-tasker (I have a serious case of ADD), I did several steps at the same time and totally messed up my kitchen. It was an intense, fun experience.


Pollo En Pipián Verde
Adapted from both Gourmet Magazine and Bon Appetit


For the chicken:

5 cups water
6 chicken thighs with skin and bones
1/4 large white onion
3 garlic cloves, halved
3 large fresh cilantro sprigs
1 teaspoon fine sea salt
1/4 teaspoon allspice
1 whole clove
freshly ground pepper

Put all the ingredients in a medium saucepan and bring to a boil on a moderate flame. Once it reaches the boiling point, turn down the heat to medium-low and simmer for 30 minutes. When it is done, remove the chicken pieces with some tongs and strain the stock. Throw away the strained matter. If you have time, refrigerate the chicken stock and spoon off the fat from the surface later.


For The Sauce:

1 1/2 cups raw green pumpkin seeds (about 7 ounces)
2 tablespoons sesame seeds
1/2 teaspoon cumin seeds
4 allspice berries (I used ¼ teaspoon powder instead)
3 cloves
6 black peppercorns
1 pound fresh tomatillos (or a 28-ounce can tomatillos, if you must)
6 fresh serrano chilies
1/2 large white onion
4 garlic cloves
1/2 cup packed coarsely chopped fresh coriander
2 teaspoons salt
1/4 cup lard or vegetable oil (I used oil)
3 cups stock from cooking chicken
1 to 1 1/2 fresh poblano chile

Roast the poblano chile. Let it cool while you toast the pumpkin seeds.

Heat a large heavy skillet over moderate heat until hot and toast pumpkin seeds, stirring constantly, until they have expanded and begin to pop, 3 to 5 minutes. Transfer seeds to a plate to cool. In skillet heat sesame and cumin seeds, allspice, cloves, and peppercorns, stirring, until fragrant, about 1 minute, and transfer to plate. When seeds and spices are cool, in an electric spice/coffee grinder grind mixture in batches to a powder (I did 2 batches).


If the chile is cool enough after having roasted, you could peel it now and discard the seeds and stem.

If using fresh tomatillos, discard husks and rinse with warm water to remove stickiness. Stem serrano chilies. In a saucepan simmer fresh tomatillos and serranos in salted water to cover 10 minutes. If you look closely at the picture below, I flipped some of the tomatillos over. The part that was submerged got less green.


If using canned tomatillos, drain them and leave serranos uncooked.

I went the extra mile at this point and sauteed my onions. I didn't have to. The recipe didn't call for it. It said to just use them chopped and raw. But I like to think of the sauteing as adding depth of flavor. I could be completely full of crap, but that’s my story, and I’m sticking to it.

Transfer tomatillos, prepared poblano chiles, and serranos (use a slotted spoon if simmered) to a blender and purée with onion, garlic, 1/4 cup coriander, and salt until completely smooth.


Here is the tomatillo sauce after being poured from the blender:


You could take a break here and put this sauce away till the next day if you wanted. Or you could continue.

In a 5-quart heavy kettle simmer tomatillo purée in lard or oil, stirring frequently, 10 minutes. The sauce will thicken. You can see in the picture below that when I ran the spatula through the middle, the sea of sauce parted and stayed parted.


Add 2 1/2 cups stock and stir in powdered pumpkin-seed mixture. Simmer sauce, stirring occasionally, 15 minutes, or until slightly thickened.


Stir the chicken into sauce and heat on top of stove or in a 350° F. oven until chicken is heated through.


You could serve this chicken with white rice, Arroz Verde, or just shred it up inside a corn tortilla as a taco. If you like tacos, you might want to see my post on preparing them.


reade more... Résuméabuiyad

Slow-Roasted Asparagus ♥

Slow cooking turns asparagus into something entirely new
Today's unusual asparagus recipe: Spears of asparagus quick-cooked, topped with grated Parmesan and dotted butter, then roasted. Low carb. Delicate, dark and dreamy.

~recipe & photo updated & republished 2012~
~more recently updated recipes~

Original Post 2008: These days, when people talk about slow food, it's generally code for Slow Food, the Italian organization that's become an international movement, one that fights the disappearance of local food traditions, people’s dwindling interest in the food we eat, where it comes from, how it tastes and how our food choices affect the rest of the world.

But not me, when I write about slow food, I mean slow food quite literally, that is, food cooked unusually slowly, sloooooow food.

This obsession with all-things-slow, it started with my first forays into slow-roasted tomatoes and really picked up steam with the life-changing slow-baked potatoes. But I would never-ever-ever have guessed that asparagus – so lovely when steamed just-til-done, you know, that tender-crisp point of perfection – would turn into some entirely different vegetable when cooked for such a long time.
Keep Reading ->>>
reade more... Résuméabuiyad

Arroz Verde


Arroz Verde (Green Rice) Is part of my Earth Week / Cinco de Mayo Mexican Dinner (to be posted later). This rice dish is deep in flavor and has a little heat. The rice is more sticky, similar to the rice in paella. I enjoyed taking the scrapings off the bottom of the pan and eating them while I plated my rice. That's might just be the best part of the rice! Yum! But I wanted to leave it out of my picture, as it doesn't look too pretty.

If you make this rice and use poblano chiles, I recommend my post on How To Roast and Peel Poblano Peppers.


Arroz Verde
Adapted from The Complete Book of Mexican Cooking

4 poblano chiles
2 cups rice
a good handful of fresh cilantro
1 large onion, chopped
1 clove garlic, crushed
4 cups stock
1/4 cup olive or salad oil
salt and pepper to taste


Cover the rice with hot water and allow it to stand for 15 minutes. Drain and rinse in cold water until the water runs clear. Drain again and dry thoroughly.

Place the chiles in the electric blender with the cilantro, onion, garlic, and a little stock. Blend until smooth.

Heat the oil in a large saucepan and saute the rice until golden. Add the puree and cook for a few minutes longer.

Add the remaining stock and season to taste with salt and pepper.

Cover and bring to a boil. Then reduce the heat and cook until the rice is tender and all the liquid is absorbed.


Serves 6


reade more... Résuméabuiyad

How To Roast and Peel Poblano Peppers

Poblano peppers are commonly used in Mexican cooking. This is what mine looked like before I roasted them:


And they are readily available. For instance, I live in the sticks (the boonies). I complain all the time about living in the middle of nowhere, but I find these at a grocery store nearby. Chances are you can find them too. Size wise, they are about the length of a bell pepper, but they are darker and more triangular.

These chiles are most widely known to be the pepper used in the dish Chiles Rellenos (stuffed chiles). They are also used in rice dishes and casseroles such as my Pollo en Pipián Verde. They are somewhat hot, but not like a jalapeño or serrano chile.

I don't think I've ever used them in a recipe that didn't call for roasting and peeling them. The roasting deepens the flavor and makes removing the peel super-easy. Here's how to do it.

When roasting their poblanos, some people use their oven or even just the flame of their stove top. I think the toaster oven is easiest. I just put them in there on the highest setting. It took about 8-10 minutes per side today to roast a few poblanos in my toaster oven.

You'll know when a side is ready because the skin will be bubbly (big bubbles) and should be blackening on those bubbles. When the peppers reach that stage, just flip them over and do the same thing on the other side. In the picture below, the one lying across in the front is ready to flip. The others are not.


Then you let them sit till they are cool enough to handle. I took pictures of mine while I waited:


When they are cool enough to touch, just pinch a bit of skin and begin to pull:


Easy-peasy!

Be sure to pull the seeds out.

If you are going to make a chile relleno, you should make a small incision (play doctor!) and remove the seeds through it. For anything else, you can just pull the chiles apart as you remove the seeds.

Now you are ready to make all kinds of delicious meals.


reade more... Résuméabuiyad

Never Buy Salad Dressing Again

Tender greens worthy of real ingredients
Pantry with a Purpose: How to stock a pantry with simple ingredients for making easy, delicious and economical homemade salad dressing recipes. Links to quick recipes for classic salad dressings from food bloggers.

Almost, not quite, but any day now, it will be salad season! Tender spring greens are soon to appear. The weather's turning warm and so we make our annual return to lighter, fresher and 'greener' food. So here's my challenge to readers of A Veggie Venture and to salad lovers from all over: Never Buy Salad Dressing Again.

I'm here to help. Cookbooks and cooking magazines often suggest ingredients for a well-stocked pantry. But how many of us fill our pantries, then forget to empty them?! And we shouldn't: 'cooking from the pantry' is the best way to save money on groceries -- at the same time avoiding the calories, additives, waste and inconvenience of carry-out, drive-through and frozen food.

So let's stock our pantries with purpose -- just for salad dressings. And then -- this is the best part -- we can learn to love the deliciousness of simple homemade salad dressings, some of us for the first time, some of us all over again. With any luck, you'll challenge yourself to make a salad every single day, for a week, for a month, for the summer, but every day. Let's get started.


KNOW YOUR STYLE!

Are you a make-it-on-the-fly salad dressing maker? Or one who wants to make a 'batch' and then use it for a week? Different recipes will appeal to these two camps so it pays to know. Don't worry, both are good and many salad-makers (me included) do both.

'Dress a Salad' Here, we make a dressing for an individual salad, whisking and tasting and adapting the dressing's ingredients for particular greens, for particular add-ons. Quantities can be adjusted to make a salad serving one or a large salad for the table.

'Make Salad Dressing' Here, we 'make salad dressing', usually a bigger batch that will last a few days or even a week or more. Quantities can be adjusted here, too, for smaller volumes.


PANTRY BASICS

Just a few pantry items. These are the only ingredients needed for beginners but also the ingredients used by experienced salad makers again and again.
Olive Oil - Preferably of high quality but perfectly good salad dressings are made with inexpensive olive oil too. If you do invest in a bottle of good olive oil for salad dressings, watch for bottles with dark glass and labels that read 'extra-virgin' and 'first cold press'. It's used in small amounts so it's just fine to buy a small bottle to minimize the up-front expense. Once home, do a taste test. Dip your finger in, does it taste good? smooth? lack harshness? Keep a bottle of good olive oil separate from the cooking oils, we don't want to waste the good stuff. Store it in a cool dark spot, behind a cupboard door, for example, rather than out in the light or near a stove's heat source.
Vinegar - Plain white vinegar or apple cider vinegar will do but may require more doctoring. If you buy just one vinegar for salad dressing, buy unseasoned rice wine vinegar which is far less harsh and is quite inexpensive.
Salt - Sea salt or kosher salt, preferably. If need be, table salt will do just fine.
Mustard - Anything other than yellow mustard of hot-dog fame. Start with Dijon mustard, a classic.


A WELL-STOCKED PANTRY

Add one or two of these extra pantry items at a time. Keep one or two of the fresh items on hand at a time.
Other Vinegars - Basics include red wine vinegar, white wine vinegar, sherry vinegar (my personal favorite) and champagne vinegar. When you open a bottle, taste the vinegar - it will be sharp, yes, but do you like how it tastes? If so, it'll make a great salad dressing.
Variety of Oils - Options include walnut oil, avocado oil, pumpkin seed oil, grapeseed oil and more. These tend to be expensive and have short shelf lives so buy in small volume and use quickly.
Dried Herbs - Especially useful for make-ahead dressings.
Fresh Garlic - A clove or two of garlic does wonders for salad dressing.
Dairy Products - Low-fat buttermilk, cream and milk are common ingredients in creamy salad dressings.
Fresh Lemons - Can be used as the 'acid' in a salad dressing, replacing the vinegar.
Fresh Herbs - Salad dressing is the #1 reason to plant a few herbs in pots on the patio or balcony. Good choices are chive, French tarragon, basil, thyme and oregano. But otherwise, buy one packet at a time from the supermarket to experiment with what you like.


TOOLS

No special tools required!

Salad Bowl I love my low, wide wooden walnut salad bowl that somehow manages to feed from one to eight. But any bowl will do, just keep it handy.
Knife & Cutting Board For quickly chopping garlic and fresh herbs.
Fork This is all that's needed to 'whisk' the dressing.
Small Food Processor For dressings that need real mixing, the food processor attachment of an immersion blender works great. Some dressings become airy and ethereal when 'emulsified' - that's the term for combining two ingredients that don't necessarily want to be combined (think oil and water), usually done by slowly adding the oil while vigorously mixing the rest -- that's best done in a large food processor or blender with an open top.
Glass bottles After emptying any salad dressing bottles already on hand (what, down the drain? who thinks I'd suggest such?!) save them for storing make-ahead dressings.


CLASSIC SALAD DRESSING RECIPES

Easy! Just hover your mouse above an interesting recipe to display the ingredients needed (past the four basics of olive oil, vinegar, salt and mustard). New recipes added as I find them.

For DRESSING a SALAD
Mostly, we 'dress salads' with a vinaigrette [vihn-uh-GREHT], a classic oil and vinegar combination with a 3:1 mix of oil:vinegar. To my taste, this is too rich so I reverse the proportions. Learn the proportion you and your family likes, it'll work again and again.
For anyone who's not 'dressed a salad' before, my photo tutorial for how to make a simple vinaigrette will be helpful.


For MAKING SALAD DRESSING


READER RECIPES Does your family have a 'house dressing'? If you're willing to share a favorite salad dressing recipe, please, I'd love an e-mail!


Who Is Up for the Challenge? Never Buy Salad Dressing Again!


SALAD & SALAD DRESSING RECIPES from the ARCHIVES
~ more recipes for 'green salads' ~
~ more salad dressing recipes ~
~ more recipes for 'vegetable salads' ~


NEVER MISS A RECIPE! For 'home delivery' of new recipes from A Veggie Venture, sign up here. Once you do, new recipes will be delivered, automatically, straight to your e-mail In Box.


Do you suffer from lachanophobia? Turn to A Veggie Venture and Veggie Evangelist Alanna Kellogg for the best vegetable recipes online. Find a quick recipe for tonight's vegetable in the Alphabet of Vegetables or plan menus with vegetables in every course. If you're a dieter, turn to hundreds of zero-point, one- and two-point Weight Watchers recipes and many low carb recipes.
© Copyright 2008


reade more... Résuméabuiyad

Southwestern Bean Salad


This is my favorite summer salad recipe and has been for a number of years now. I guess you could say it is my go-to dish! I bring it to parties and dinners and people always enjoy it (that is, those who like the ingredients). Joe won't touch the stuff! The tropical fruit and jicama takes it out of his comfort zone. But I can't get enough of it!


In the version I made today, I used mango. I actually was looking for papaya, but the store I visited only had the huge ones, and they were expensive. The mangoes, however, were half price! It was good and ripe too. Really, I like both fruits equally in the recipe, though I've never used both at the same time.


Speaking of tropical ingredients, the one that might be new to some people reading this, is the jicama.


a beautiful
example


mine:
half-naked view


I've heard jicama described as a cross between a potato and an apple. I think that is a good description. It grows like a potato, but the inside is light and crisp. It isn't as bland as a potato in taste, nor is it as sweet as an apple. Mine was about the size of a large grapefruit. But sometimes they are smaller, like the size of a softball. They usually are somewhat flat from top to bottom, like the example picture shows.


I'm going to use my leftover jicama for something else - maybe a jicama slaw, or jicama sticks with some sort of dressing. I only used about half of the smallest one that the store had.


Getting back to the recipe, it came from a book that I purchased in the late 1990's. At the time, and maybe to this day, it was one of the only Mexican cookbooks that listed nutritional information. Since I changed the recipe ingredients and measurements, I don't feel confident showing that information, but I am sure I knocked down the calories significantly since one of the changes I made was to cut the amount of oil in half.


Southwestern Bean Salad
Adapted from The Ultimate Low-Fat Mexican Cookbook

The Dressing:
2 garlic cloves, minced
5 Tbs. fresh lime juice
2 Tbs. vinegar
1 tsp. dijon mustard
1 tsp honey
¼ cup light-colored vegetable oil
½ tsp. oregano
½ tsp. salt


The Rest:
1 15-oz can black beans, drained and rinsed
1 15-oz can small red beans, drained and rinsed

1 small bunch scallions, sliced (green and white parts)
1 ½ cups diced jicama
1 small can of corn kernels, drained and rinsed
1 cup chopped red bell pepper
1 chopped mango or 1 cup chopped papaya
1 minced jalapeno (seeds removed)
¼ cup fresh chopped cilantro


The Process:
Chop-up all of the fruits and vegetables.


Combine them with the beans and corn in a large bowl.


In a small Tupperware, combine the dressing ingredients by covering the dish and shaking really hard. Add it to the rest of the ingredients and toss to coat.


Refrigerate for 4-5 hours before serving.


reade more... Résuméabuiyad

How To Chop A Mango

Mangoes can be, well, slippery. They also have a large pit that is difficult to cut down to because the flesh of the mango can get very fibrous towards the pit. Unlike a peach, it's not an easy operation to remove the flesh from the pit.

That makes mangoes a challenge to cut-up when no one has ever told you the best way to do it. Allow me to be that influential person!

Hold the mango like a football that's about to be kicked.

Choose a side and begin to slice downward about an inch away from the center. If you hit the pit, move the knife over and start again, but get as close to the pit as possible and still be able to cut all the way through the mango.

With your knew mango piece, run the knife in a crosshatch pattern to score it. Try not to cut through the skin.


Then take the piece and invert it so it looks kind of like a little hedgehog.


While successful, those chunks were big and had to be cut further for my Southwestern Bean Salad recipe.


Here's a picture of my second try, making the scoring marks closer:


Ah, that's better!


Then just pick it up and run the knife at the bottom of the scoring marks, just at the line of the skin. the hunks just fall right off.


Continue with the rest of the mango.


reade more... Résuméabuiyad