Pages

.

Beet, parsnip and sweet pepper soup

Perk up a cold mid-winter evening with the enervating colours and comforting aromas of this pureed soup.

Beet, parsnip and sweet pepper soup
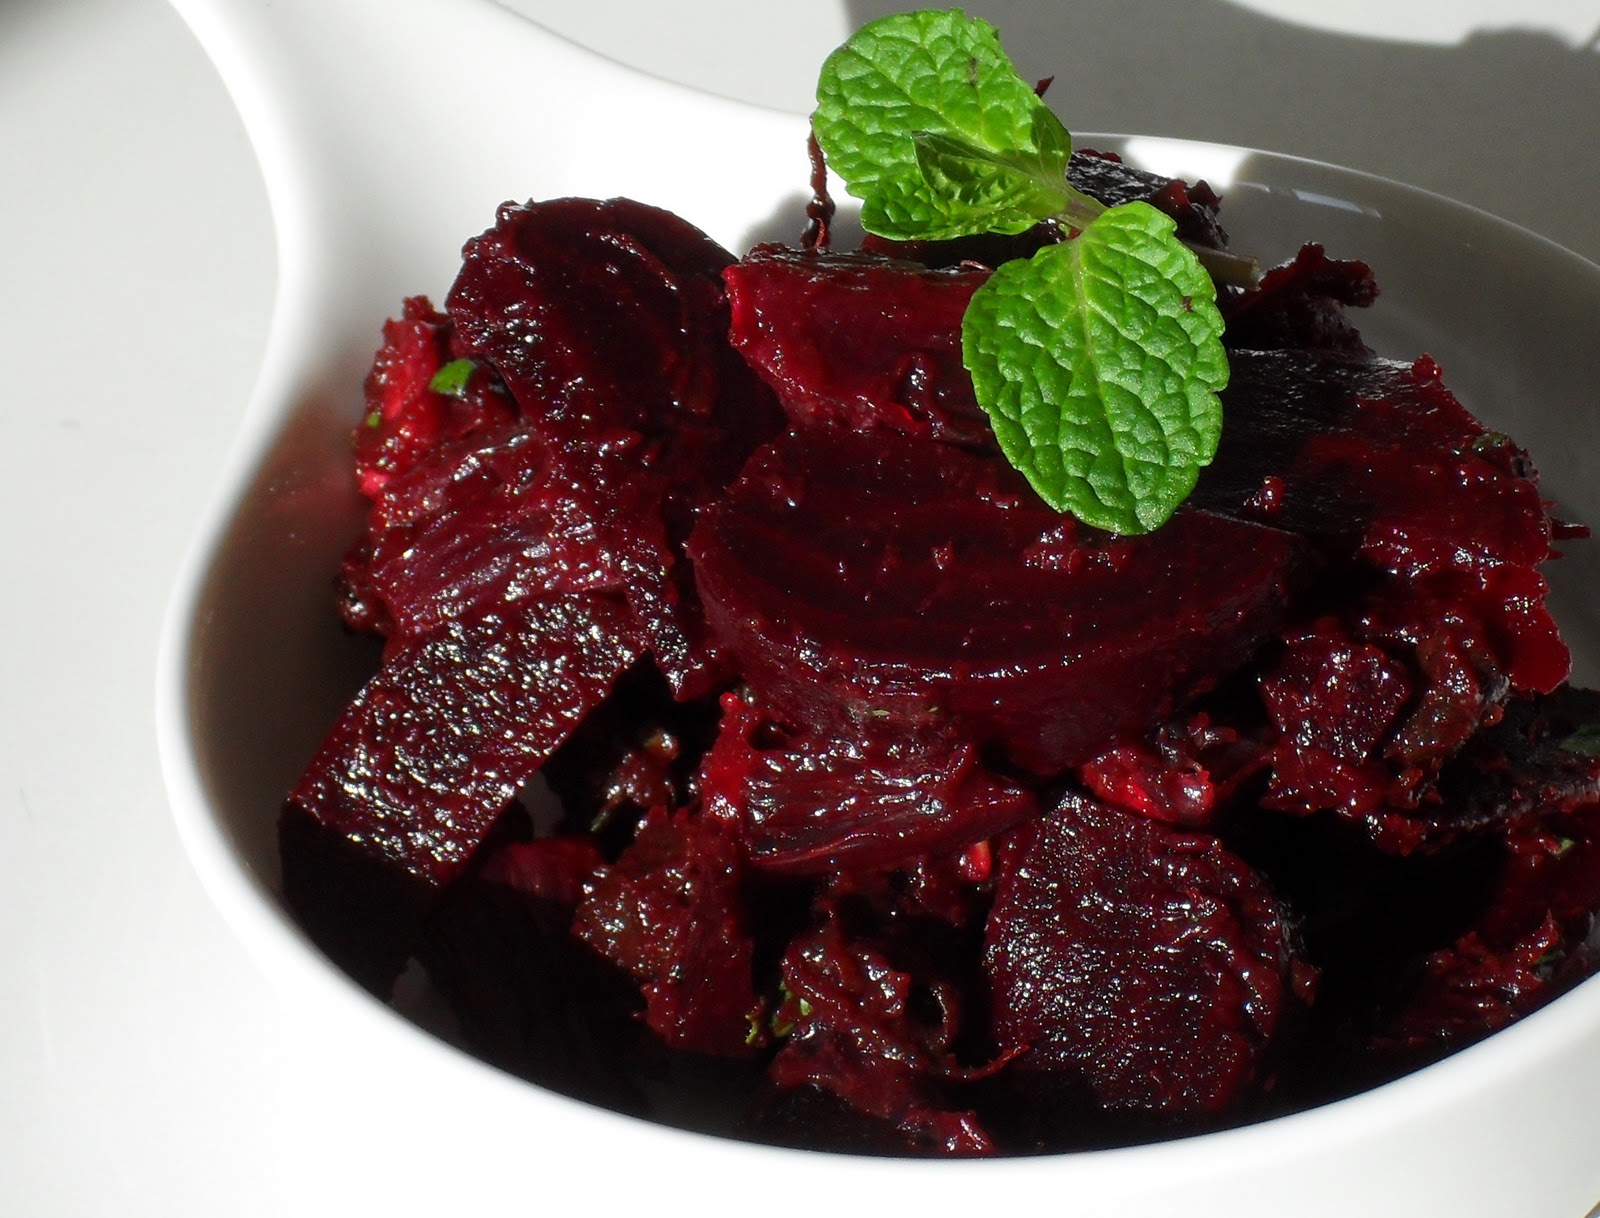
Cooked beet, purple potato and
carrot


Ingredients (red soup):
½ teaspoon coconut oil
½ cup chopped red onion
½ clove garlic, crushed
1 small beet, steamed, peeled, chopped
½  carrot, steamed, peeled, chopped
2 purple potatoes, steamed, peeled, chopped
1 cup beet stock or chicken stock

                                      
Cooked and diced ingredients
for the yellow soup

Ingredients (yellow soup):            
½ teaspoon coconut oil
½ cup chopped white onion
½ clove garlic, crushed
1 parsnip, steamed, peeled, chopped
1 white potato, steamed, peeled, chopped
½ yellow sweet bell pepper, diced
¼ orange sweet bell pepper, diced
1 cup chicken stock


Garnish: 
1 sprig cilantro

Preparation :

1. Use two saucepans. You will cook in both pots at once, treating each mixture separately. Melt ½ teaspoon coconut oil in each pot. Place red onion and garlic in one (the red pot), and white onion and garlic in the second (the yellow pot).

2. To the red pot, add all items listed under Ingredients (red soup).   

Beet soup (red pot)


3. To the yellow pot, add all items listed under Ingredients (yellow soup).

Parsnip and sweet pepper soup (yellow pot)

4.  Simmer both mixtures for 10 minutes.

5. Decant the contents of the red pot into a blender. Pulse at high speed until the mixture is thoroughly pureed. Pour the red puree back into the red pot and reheat over low heat.

Beet puree
6. Thoroughly wash the blender, then decant the contents of the yellow pot into it. Pulse at high speed, as you did with the red mixture. Pour the yellow puree into the yellow pot and reheat. At this point, you may wish to add salt, pepper or other preferred seasonings to each puree.

Parsnip and sweet pepper puree
8. Ladle ¾ cup red puree into one measuring cup and ¾ cup yellow puree into another measuring cup.

9. Simultaneously, pour into a soup bowl from both measuring cups to create the effect shown in the illustration above. Garnish with a sprig of cilantro.
reade more... Résuméabuiyad

On Food and Choices

I shop, primarily, at Rainbow Co-op Grocery and the Ferry Plaza Farmer's Market. I shop seasonally within my geographical region (in the majority - there are some exceptions - yeah, we don't grow coffee beans in California), purchase organically grown food, or food where no pesticides or hormones have been used.  I buy meat that has been ethically raised and slaughtered, check my Seafood Watch iPod app before I buy or order fish or seafood. I eat meat or fish or seafood about three times a week on average. I buy as many un- or minimally processed foods as I can. I do not knowingly purchase GMO foods and I try to use as much of the food I purchase as possible without waste. 

Why? In part, because I can.  I am single, employed with enough disposable income and time to enable my choices.  I spent about three months back in 2007 thinking about how I could change my relationship to food - not just what I wanted to or should eat but everything to do with food the food I choose and purchase. It is a process.

I do not adhere 100 percent to my own personal guidelines, nor do I voice them unless asked when I have been invited into someone's home. I will not criticize others' choices - I do not live in their shoes. I do the best I can when I'm traveling.

I know that on extreme ends of the spectrum - and I am not going to assign a label to either - I am considered un-American, naive, over-privileged, under-informed, half-assed and just plain wrong.  I can live with that. The only thing I find offensive is when people are willfully uninformed, willfully unwilling to try and understand others' point of view or circumstances and willfully unmindful about their own choices.

(I LOVE "Portlandia" - it is a multi-part original comedy series on IFC. The description is of a, "...dreamy and absurd rendering of Portland, Oregon.". Check it out.)
reade more... Résuméabuiyad

How to Eat More Vegetables: Tip #3

baby carrots from Flickr vibrant_art
We all know we should eat more vegetables. But how, how do we do that, really? What real-life tips and ideas work? How can we build our lives around the healthiest of all foods, vegetables? Every Saturday, the 'veggie evangelist' shares practical tips and ideas from her own experience, her readers and other bloggers.

This week's tip:

Keep Reading ->>>
reade more... Résuméabuiyad

Stove-top beet casserole


Yield: 4 - 6 servings

Enjoy the many health benefits of beets while using up left-over cooked chicken or turkey. The addition of Raincoast Crisps makes this beet casserole into filling brunch. In this instance, I used the fig and olive variety of Raincoast Crisps .
Beet casserole brunch with Raincoast Crisps

This highly-coloured beet casserole provides the nutrient value of two cups of cooked beet root. 

Fresh sweet peppers, shallot, oregano and thyme
Sweet peppers increase the amount of phytonutrients without adding starches or gluten. The aromatics -- thyme, oregano and shallot -- season the beets and poultry while contributing small amounts of vitamins (A and C) and minerals (calcium and iron).


The stove-top beet casserole is made in two stages. First, relish is made and set aside to enable the flavours to mingle. Next, the casserole is prepared in a saute pan on the stove top. When the casserole has been cooked, the relish may be spread on top  before serving, or it may be presented as an accessory to the casserole.

Chopped thyme


Relish

Ingredients (relish):
2 tablespoons chopped fresh oregano leaves
2 tablespoons chopped fresh thyme leaves
¼ teaspoon hot chilli sauce
½ shallot, finely chopped
½ of a 300 ml. jar flame roasted sweet red peppers, drained, chopped
2 tablespoons liquid honey

Chopped shallot


Preparation (relish):

1. Place all ingredients in a mixing bowl. Combine. Set aside in refrigerator.


Relish prepared for beet casserole
Beet Casserole

Ingredients:
1 cup chopped cooked chicken
2 cup chopped cooked beets
¼ green pepper, finely chopped
¼ yellow pepper, finely chopped
¼ orange pepper, finely chopped
½ shallot, finely chopped
2 tablespoons lemon juice
2 tablespoons chopped fresh oregano leaves
2 tablespoons chopped fresh thyme leaves
1 egg
½ cup commercial soured cream
1 tablespoon coconut oil
¼ cup fine dried bread crumbs

Preparation:

Beet casserole mixture and bread crumbs
1. Combine the first nine ingredients together in a mixing bowl.

2. Break egg and add to soured cream. 
Stir, then add to the combined ingredients
in the mixing bowl, folding all together.


3. Place coconut oil in saute pan over medium heat. When the oil has melted, add the contents of the mixing bowl to the saute pan, spreading it evenly. 

4. Reduce heat to medium-low. Cover and allow the casserole to steam in the saute pan for approximately 15 minutes. 

5. Remove the lid, sprinkle bread crumbs over the surface and allow to heat through for approximately 5 minutes.

6. Turn out the casserole to a serving dish. Spread prepared relish over the top.

Beet casserole side dish
A small portion of this beet casserole makes an interesting side dish to a main meal.
reade more... Résuméabuiyad

Thoughts on Kale De-Stemming and Pre-Cooking

De-Stemming.

I eat a lot of kale - both cooked and raw. I am lucky to be able to get it year 'round at farmers markets.  The size varies by season.  Right now (February) the stems are generally pretty short (5-7") from stem-end to tip of the leaf, but during the warmer months, very often twice that - or more. Every week I cook up a bunch (or two) to store in the fridge for daily use or use it in a few dishes or a salad.  Many recipes advise you to de-stem by cutting out the stem from the entire leaf.  If I am going to use only four leaves of kale this is fine, but if I am de-stemming two large bunches, I start to feel a little stab-y.

Sometimes I just cut off the woody part of the stems from the bottom of the leaf and don't bother with de-stemming.  If the leaves are tender, it's just not necessary.  I have tasted the stems and as long as it's not woody or stringy, they are generally tender enough, especially if cooked.

How to De-Stem Kale


The easiest and fastest way I've found to de-stem kale is to use your fingers to tear a tiny bit of the leaf at the lowest end on both sides of the stem and then, holding the end of the stem in one hand, strip the leaf off with the other, towards the tip end.  Think about how you strip rosemary leaves from a stalk. Same deal-io.

It is very easy...
...and very fast...

 ...and two batches are de-stemmed in no time flat and ready for washing.

Pre-Cooking.


I just don't understand why recipes so often recommend that you cook kale in vast quantities of water for 5 or even 10 minutes (gasp!) before sauté-ing or adding to other dishes. Curly kale might be a little unruly (it can be very curly) but you might as well chuck a fist-full of cash into the street, if nutrients (not to mention taste) were dollars, when you boil it.  If you must reduce the volume, or need to get the water our of the kale for use in a recipe (as you would by squeezing spinach) either saute or steam it first.  If you know how to do this with spinach, you're good to go with kale.

Wash your kale in a really big bowl by filling it up with water. The bowl needs to be big enough so that there is room for any dirt or grit to sink to the bottom - or do it in batches Add the kale leaves (chopped however you plan to use them is easier than full leaves) and swish it around. A lot. Swish it around a few more times and then don't touch it for a few minutes. After it has rested, pick up handfuls of kale being careful not to disturb the water, and place in a clean bowl shaking a little - but not all - of the water off the leaves in the process.

Heat up a large pan or dutch oven with about a tablespoon of oil - medium high - until the oil is shimmery and there's no more than a tiny wisp of smoke.  Throw a couple of handfuls of kale in the pan and toss it around with a pair of tongs. Push that batch aside and add a couple more handfuls and toss. Repeat until you've added all of the kale, and it is reduced in volume.  Taste it periodically and you shouldn't cook it until it's too limp. I like mine to be brightly colored and tender - not limp and discolored.
reade more... Résuméabuiyad

Roasted Meyer Lemon Slices

You can use any type of lemon.  I prefer Meyers or any type with a thin-ish peel (and therefore less pith). I recently used these (chopped up) in a kale, olive and caper recipe (to be posted) and am planning to pop them into a variety of dishes.  I store mine in a zip-lock bag with a little olive oil slurped in to keep them pliable.


Recipe: Roasted Meyer Lemon Slices


Ingredients & Equpiment:
  • Meyer lemons or any lemon - those with a thinner peel are best.
  • Olive Oil - regular or extra virgin
  • Baking sheet lined with parchment paper or a silicone baking mat
  • A very sharp knife
Method:

Preheat the oven to 375 F / Oven rack placement: middle

Slice the stem and flower ends off of the lemons to the point where there is no pith showing on the face of the lemon. Slice each lemon in 1/4 inch slices being as careful as possible to slice them to an even width. Remove the seeds from each of the slices.  Make sure you look at both sides - sometimes you can't see the seeds until you turn over the slice.

Pour about 1 Tablespoon of oil onto the parchment-lined baking sheet and use a pastry brush to spread it out over the entire surface.  The oil will bead up a little - that's okay.  Lay the lemon slices out on the baking sheet - leave at least 1/2 inch between slices.  Sprinkle a little olive oil over the top of the slices and place on the middle-rack.

Set the timer for 15 minutes.  Check the slices and turn them over.  You're looking for some nice caramelization and browning on both sides and on the edges.  If you (like me) don't make perfectly even slices, you'll need to watch those with thinner edges and remove the early browners.  Once turned, set the oven for another 10 minutes and check. If you're still not happy with the caramelization, check again in 5 minutes.  I don't recommend waiting in longer increments - the slices can go from "not quite ready" to "oh crap - they're burned" very, very quickly. Cool them down on the baking sheet before handling.
reade more... Résuméabuiyad

Review - Kitchen Calculator App

I was a music major and had to take, "Math for Music Majors".  No, that's not a class that marries math with music.  It was a class for music majors who didn't give a rat's ass about anything other than music (me) and (historically) had the attention span of a bivalve (just guessing here about the attention span of a bivalve) for math and science classes (also me).

When I need to convert units when cooking, it's not something I'm going to be able to do in my head. Ever. Ergo, it is handy to have a helper just waiting to do my bidding.  I have no idea where or how I found this app, but I use it enough to rate it as "Worth the $".

Publisher: Forward Leap, LLC
Price on review date: $2.99
Runs on: iPod and iPhone
My Rating: Worth the $


In addition to the ability to convert by weight, volume, temperature and  dimension, there is a calculator (+/-), a quick start guide (?) and a settings button (check mark), which allows you to select US or UK units.

 Note: the vendor has a new(ish) app: Kitchen Calculator Pro that includes the ability to:
  • scale recipes;

  • convert ingredients from weight to volume (cups to grams, ounces, etc.)

  • display results in standard cooking fractions

  • 'grow' a database of ingredients, based on the built-in database of common ingredients from the USDA.

Am I going to shell out the $3.99 for the 'Pro' version?  Probably not, although the weight-to-volume (and vice versa) feature is attractive. It's annoying that I cannot pay an upgrade price instead of having to re-pay for the features I already have.
reade more... Résuméabuiyad

Raw Kale Salad with Meyer Lemon Vinaigrette

I first ate this at Seester #1's house one Thanksgiving and I was well and truly hooked. There have been weeks where I ate this five days in a row.  Sometimes I wash, dry and prep the kale and then wrap it in a length of paper towel, then store it in a plastic bag.  It will stay fresh for several days.

I most often see this kale labelled as "Dino" because of the pebbled surface of the leaves.  There are many types of kale, but this is my favorite and I can't imagine making this salad with any other type. See: Kale (Wikipedia) and Google Image search for "kale varieties".


Raw Kale Salad with Meyer Lemon Vinaigrette
Serves 2 to 4

Ingredients:

1 large bunch Tuscan kale (also known as dino, black or lacinato kale), leaves washed and thoroughly dried.
1/4 cup homemade toasted bread crumbs (coarse)
1/2 or 1 medium garlic clove, mashed into a paste
1/4 cup finely grated Pecorino Romano cheese, more for garnish
3 tablespoons extra virgin olive oil
2 table spoons freshly squeezed Meyer lemon juice
1/4 teaspoon kosher salt
1/8 teaspoon red pepper flakes
Freshly ground black pepper, to taste.

 Method:
1. Trim bottoms off of the kale stems (up to the bottom of the leaf) and discard. Stack the leaves (as many as can be handled).  Chiffonade the leaves (crosswise, along the length of the leaves)  into ribbons no wider than linguine pasta. You should have 4 to 5 cups. Place kale in a large bowl.

2. If using bread, toast it until golden on both sides. Tear into small pieces and grind in a food processor until mixture consists of coarse crumbs.

3. Transfer garlic to a bowl. Add the cheese, lemon juice, salt, pepper flakes and whisk for about 30 seconds. Add  the oil in a thin stream and whisk until emulsified.  Pour the dressing over the kale and toss very well to thoroughly combine. Add black pepper to taste and toss again.

4. Let salad sit for 5 minutes (I've let it sit for up to 20 minutes), then serve topped with bread crumbs and a dusting of additional 2 tbsp. finely grated cheese. 

reade more... Résuméabuiyad

A Crazy Good Make-Ahead Creamy Mac & Cheese


Several people asked for this recipe from Seester #1:

"I used a 'make-ahead' recipe from Cook's Country, amping up the mustard x2 (no need to use dry; I used Dijon), the cayenne by x3, adding Worcester--about two teaspoons, and replacing some of the Colby with Fontina, another good melter with a more interesting flavor.

The recipe was developed to allow making it in advance without it drying out while in the oven-- a problem with baked mac n'cheese. You'll see it references freezing it prior to baking and to quicken defrosting, using 2 8" pans instead of 1 larger one. I didn't freeze it; I simply made it the day before so used a larger pan."


Make-Ahead Creamy Macaroni and Cheese
Serves 8-10


4 slices hearty white sandwich bread, torn into pieces
1/4 c. grated Parmesan
1 clove garlic, minced
8 T. butter, melted
salt and pepper
1 lb elbow macaroni
3 T. AP flour
1/4 to 1/2 t. cayenne or to taste
1/2 T Dijon mustard
2 t. Worcestershire sauce
4.5 c. low sodium chicken broth
1.5 c. heavy cream
2 cups shredded Colby cheese
2 cups shredded Fontina cheese
2 cups shredded extra sharp Cheddar


Topping:
Pulse bread, Parmesan, garlic and 2 T butter in food processor until coarsely ground. If freezing the macaroni and cheese, divide the crumb mixture between two zip-lock bags and freeze.

Cook Pasta:
Bring 4 quarts of water to boil. Add 1 T. salt and macaroni and cook until barely softened, about 3 minutes. Drain pasta--don't rinse--then spread out on half-sheet pan to cool (not rinsing the pasta preserves the starch, which helps to stabilize the sauce while baking).

Make Sauce:
Heat remaining butter, flour, cayenne and mustard in 4 qt saucepan or dutch oven over medium high heat until golden and fragrant, stirring constantly, for 1 to 2 min. Slowly whisk in broth and cream and bring to boil. Reduce heat to medium and simmer until slightly thickened about 15 min. Off heat, stir in cheeses, 1 t. salt or to taste and 1/2 t. pepper until smooth.

Freeze:
Stir cooled pasta into sauce and divide between 2 8" baking dishes. Cool to room temp, about 2 hours. Wrap tightly in plastic, cover with foil and freeze up to two months.

Bake:
Adjust oven rack to middle and preheat to 375 degrees. Remove foil from casserole and reserve. Microwave casserole dishes until mixture is thawed and beginning to bubble around the edges, 7 - 12 min, stirring halfway through the cooking time. Discard plastic and cover casseroles with foil. Bake 20 min., then remove foil and sprinkle with bread crumbs. Continue to bake until topping is golden brown and crisp, about 20 min. longer. Let cool 10 min. before serving.
reade more... Résuméabuiyad

Baked Corn Pudding: Simple and Delicious

This recipe has been updated, see: Baked Corn Pudding - Version2: Updated and Improved

No cream, no aromatics, no bacon, no cheese (gasp!).  Corn, butter, salt. and pepper.  Eat it and be happy.

Ingredients
  • 6 ears fresh corn

  • 2 tsp kosher salt (1 tsp iodized salt)

  • 4 tbsp unsalted butter + more for greasing the baking dish

  • 1/4 tsp kosher salt  (a small pinch iodized salt) for the top

  • Pepper to taste


Equipment:
  • Box grater or corn creamer

  • A big, wide bowl in which to grate the corn

  • 8" square baking dish, greased with butter (compare the a volume of corn to the volume of your baking dish before greasing it - use a smaller or larger size baking dish as necessary)


Instructions
  • Preheat oven to 400 F (204 C)

  • Using the box grater, remove the meat and juices from each of the ears working very close to the cob - you want this to be very mushy and milky.  For me, cutting the ears in half makes them easier to handle.  Once you have finished the corn, season with salt and pepper, tasting the mixture.

  • Pour the corn mixture into the baking pan.  Smooth out the top and dot with butter.  Sprinkle the top with the additional salt.

  • Bake on the middle rack at 400 F uncovered for 45-50 minutes (start checking it at 40 minutes), or until the top is golden brown around the sides and the corn is bubbling.  Remove from the oven and let it rest for a few minutes before serving.

reade more... Résuméabuiyad

Brussels Sprouts with White Beans and Pecorino

This is a Thanksgiving "must have" for me.

From: Epicurious: Bon Appetit, November 2005
Serves: 6 as a side dish.

4 tbsp extra-virgin olive oil, divided
1 pounds brussels sprouts, trimmed, cut in half lengthwise
3 garlic cloves, chopped
1/2 cup low-salt chicken broth (or water, for a vegetarian dish)
1/2 15-ounce can cannellini (white kidney beans), drained
1 tbsp butter
1/2 cup coarsely grated young pecorino like Pecorino Toscano


Method:
Heat 1.5 tablespoons oil in heavy large skillet over high heat. When just about to smoke, add half of the brussels sprouts. Cook until brown, stirring occasionally, about 5 minutes. Transfer to large bowl. Heat 1.5 tablespoons oil in same skillet. Add remaining brussels sprouts, reduce heat to medium-high, and cook until brown, stirring occasionally, about 5 minutes. Transfer brussels sprouts to same bowl.

Add remaining oil to skillet; increase heat to high. Add garlic; sauté until brown, stirring constantly, about 1 minute. Add broth and brussels sprouts. Cook until brussels sprouts are crisp-tender, stirring frequently, about 3 minutes. Add beans and butter; stir until butter melts and broth is reduced to glaze, about 1 minute. Season with salt and pepper. Take off-heat and stir in the cheese.
reade more... Résuméabuiyad

Tamarind beet salad

Tamarind beet salad with blood orange
                                                             Yield: 2 servings

Tamarind beet salad is slow food. The sweet-sour character of tamarind, together with the added spices, renders this dish a prime accompaniment for roast beef, moose, venison or bison, or for game birds.


Tamarind beets


Tamarind puree is made in the old-fashioned way, requiring slow and careful stirring of the mixture by hand. When the puree is cooked, it is stored to cool. Cooked beets are then sliced and the puree is added to the beets, along with a sliced and segmented blood orange.


Tamarind puree
                                               Yield: approximately ½ cup puree

Soft dried tamarind
Ingredients:

¼ cup soft, dried tamarind (approximately), without seeds
7 - 12 tablespoons hot water
½ teaspoon extra virgin olive oil
¼ teaspoon ground ginger
¼ teaspoon whole fennel seeds
¼ teaspoon ground cumin
pinch of garam masala

Preparation:

1. In a heat-proof bowl or small cooking pot, place tamarind and 3 tablespoons of hot water. Squish, stir and generally do what you must to loosen and soften the tamarind, liquifying it into a puree. Add hot water, 1 tablespoon at a time until the mixture becomes a liquid puree rather than a paste. It may take 20 minutes to reach the puree stage, depending upon how soft the block of tamarind was initially.

Even although there are not supposed to be seeds in the tamarind block, often there are. Remove seeds and discard them.

2. In a small cooking pot, place the tamarind puree over medium heat until steam rises, then reduce heat to simmer.

3. Add the remaining ingredients. Stir gently and continually for 5 - 20 minutes, allowing the spice flavours to be released and to mingle.

Tamarind puree

4.  Decant into a tightly-lidded container and store in refrigerator to cool.


Tamarind beet salad

Chopped beets, blood orange and fresh mint
Ingredients:

4 small beets, cooked according to your preferred method, peeled, sliced and chilled
1 blood orange, peeled, sliced and segmented
3 tablespoons prepared tamarind puree
fresh mint


Blood oranges
Preparation:
Place  all ingredients in a bowl and fold them together. Spoon into serving dishes and garnish with mint.
reade more... Résuméabuiyad

Spinach Ricotta Gnocchi with Creamy Tomato Sauce ♥

Spinach Ricotta Gnocchi with Creamy Tomato Sauce
Today's vegetable recipe: The classic Italian spinach gnocchi [pronounced NYOAK-ee, or, read on, there's a musical mnemonic too], what you might call a dumpling but light and airy and slightly cheesy. Gnocchi are not difficult to make but do take some time. The results, however, are worthy of a special occasion or a relaxed weekend meal.

So I like to joke that there's an Unofficial Alanna Kellogg Fan Club and that it has exactly one member. That's our new friend Charlie and given his long-standing encouragement, I've appointed Charlie president. (Update: And someone's appointed himself vice president! Hello, David Sacis!)

Laugh if you will but it's true. Some years back, Charlie read and liked Kitchen Parade when it was published in the local newspaper. He's a volunteer poll worker too so one election, Charlie watched for me and put out his hand to introduce himself. Fast forward to 2011 and Charlie and and his wife Jan's introductions to the Missouri Mycological Society and a smaller culinary group, the Incurable Epicureans. Both warmly welcome new faces. They're good good people and they don't just like mushrooms, they love good food! Four times a year, they prepare a 'theme meal' for forty or fifty people. On Sunday, we attended our first, a feast of Marcella Hazan recipes. What a meal! There are at least two, maybe three recipes I'll make to post here on A Veggie Venture, simple, fresh and seasonal, you know, the recipes we like best!
Keep Reading ->>>
reade more... Résuméabuiyad

Nutritional value of beets - Part 5: Beet greens (raw)


Raw beet greens

Beet cultivation originated in the Mediterranean basin well before the Greeks became a predominant force. Beets were valued for their leaves rather than their roots; they were commonly known as blood root. Thus, when we use beet leaves, we are reverting to the original use of the plant.

Beet greens are also called beet leaves and beet tops. Whatever you wish to call them, they are a rich source of nutrients and nourishment.

This article discusses only those nutrients present in the highest quantities in beet greens. For a more extensive list of nutrients and their associated values, please refer to the USDA National Nutrient database.

The nutritional values of beet greens are most abundantly represented in the following listed vitamins and minerals:


Measure: 38g (1 cup)
Calories: 8

Principle
Nutrient value
 % of RDA*
 M --- F
2404 IU
48 - 60
152 mcg
19 - 19
11.4 mcg
190 - 190
290 mg

26.6 mg
7.4 - 8.9
0.1 mg


IU = International Units; mg = milligram; mcg = microgram
RDA = Recommended Daily Allowance; M = male; F = female

* RDA has been made obsolete by the USDA and so, as of March 2011, when I do mention it, it shall only be as a quaint matter of historical interest. RDA has been replaced by three other measures which are (a) unrelated to RDA and (b) meaningless for all practical purposes at this time. This will remain the case until such time as the new measures are sufficiently and comprehensively developed to the point of serving a meaningful purpose.

For a broad overview of one of the new, incomplete standard measures, check out Dietary Reference Intake .

reade more... Résuméabuiyad

How to Eat More Vegetables: Tip #2

We all know we should eat more vegetables. But how, how do we do that, really? What real-life tips and ideas work? How can we build our lives around the healthiest of all foods, vegetables? Every Saturday, the 'veggie evangelist' shares practical tips and ideas from her own experience, her readers and other bloggers.

Wow! Thanks so much to the passionate vegetable lovers who took time to fill up my mailbox last week when I launched this series of posts about How to Eat More Vegetables, your ideas are truly inspiring. Readers, I'm going to incorporate your best tips into the weekly tips, look for your names in pixels, soon! (And please, keep them coming!) Bloggers, this week two bloggers wrote posts on this topic, their links are below.

And now for this week's tip:

Keep Reading ->>>
reade more... Résuméabuiyad

Borscht No. 1

Admit it. This is what you've been waiting for. Borscht! Beautiful, filling, delightful borscht: the Monarch of Soups.

Er, okay...maybe not. But it is delicious.


Borscht No. 1
                                                        Yield: 6 - 8 servings

This borscht requires the use of black garlic which lends a somewhat beefy flavour to the broth.

Borscht with soured cream

Ingredients:
4 small beets, about 3 - 5 cm. (1.5 - 2") in diameter
1 carrot
1 medium-sized red potato
1/2 cup red onion, diced
1 cup grated purple cabbage
2 cloves black garlic, finely chopped
4 sprigs fresh dill
3 - 5 cups chicken stock or water from steaming vegatables
1 tablespoon red wine vinegar or lemon juice
freshly ground black pepper
1/2 cup commercial soured cream

Beets, carrot, potato, black garlic and purple cabbage


Preparation:
1. Thoroughly scrub beets, potato and carrot under running water to remove sand and debris. Remove any wilted or discoloured tops and roots. Place whole beets in the basket of a food steamer or pressure cooker. Steam vegetables. If using a pressure cooker, follow the user manual. Otherwise, when a fork can easily pierce a beet to the centre, turn heat off. Remove vegetables to a heat-proof container and set aside to cool. Reserve fluid from steamer to use in this borscht preparation, or else store for later use.

Steam rises off the beets, carrot
 and potato cooked in a pressure cooker


2. When beets, potato and carrot are cool enough to handle, slip the peels away. Dice. Reserve. 

Diced beets, carrot and potato


3. Place peeled and diced red onion in the soup pot together with diced black garlic, whole sprigs of dill and 3 cups of chicken stock (or the liquid of your choice). cover. Bring to boil, then reduce heat to simmer for 5 minutes.

Black garlic and fresh dill


4.  Add diced beets, potato and carrot. Bring to boil, then reduce heat to simmer for 5 minutes to enable flavours to mingle.


5. Add grated purple cabbage. Raise to boiling point, then reduce heat to simmer for 10 minutes.


Purple cabbage cooking in the beet mixture


6. Remove from heat. Add freshly ground black pepper to your taste. Add red wine vinegar or lemon juice. Stir.

7. Ladle into bowls. Top each bowl of borscht with a tablespoon of soured cream.


You will want second servings. 
reade more... Résuméabuiyad