Pages

.

Supper Casserole with Pumpkin & Green Chile Cornbread Topping ♥ A Welcome-to-Fall Recipe

Supper Casserole with Pumpkin & Green Chile Cornbread Topping
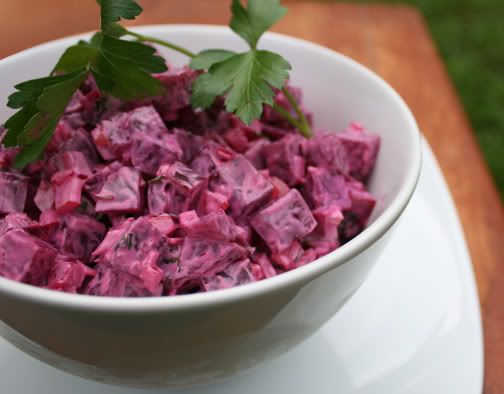
A one-dish casserole supper, meat cooked with on-hand vegetables and flavored with green chile salsa. The cornbread topping repeats the green chile flavor and adds pumpkin for color, moisture and nourishment.

Who else has noticed? When winter turns to spring, we long for the first bites of spring, waiting with much anticipation for the first asparagus, the first artichokes, the first strawberries.

But fall? Not so much. As soon as fall 'happens' -- it hit here in St. Louis on Monday -- we can immediately start cooking our fall favorites. You see, they've been around for a few weeks, we've just been ignoring them to get our last fill of tomatoes and peppers and okra and and and.

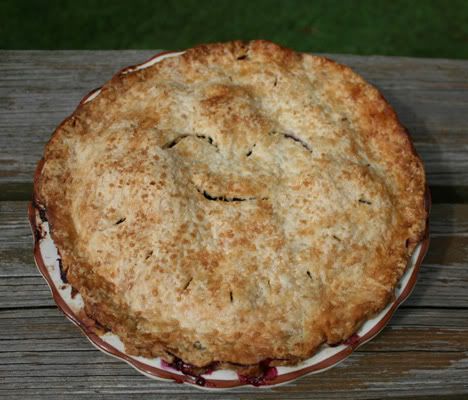
For me, cornbread is one of the siren calls of autumn and the cold-weather months, baked first, baked last, baked often in between. It was a welcome welcome to autumn. I pulled this Supper Casserole out of the pantry, you can too by using what meat (Note to Vegetarians) and vegetables you have on hand, then topping it with the pumpkin-colored and chile-spiked cornbread.

Hello fall, glad you're here.

SUPPER CASSEROLE RECIPE with PUMPKIN & GREEN CHILE CORNBREAD TOPPING

Hands-on time: 35 minutes
Time to table: 90 minutes
Serves 6 or 8

MEAT LAYER
Splash of water
1 onion, chopped
1 pound ground beef (or ground turkey or in my case, ground elk)

2 cups slow-roasted tomatoes or 15-ounces canned diced tomatoes
1 cup green chile salsa
1 cup frozen corn (no need to thaw)
15 ounces canned black beans, rinsed and drained
1/2 cup canned pumpkin purée (make sure to buy 100% pumpkin, not pumpkin pie filling)
1 teaspoon kosher salt or salt to taste

Preheat oven to 350F. In a large deep skillet, cook the water, onion and ground meat until onions are soft and meat is fully cooked (for the most flavor, let the meat 'brown' and even get a small amount of 'burn' before turning it). Stir in the remaining ingredients. Transfer to a low casserole dish.

CORNBREAD LAYER
1 egg, whisked
2 tablespoons brown sugar
1 cup canned pumpkin purée
4 tablespoons butter, cubed and melted in the microwave in 10-second increments
1/2 cup green chile salsa

2 cups flour, fluffed to aerate before measuring
1/4 cup yellow cornmeal (stone-ground cornmeal is too coarse here for my taste)
1 teaspoon baking powder
1 teaspoon chili powder
1/2 teaspoon table salt

In a large bowl, whisk together the egg, brown sugar, pumpkin, butter and salsa. Separately, whisk together the remaining ingredients, then stir into the egg mixture. Using two spoons (one to scoop, one to scrape) place small dollops of the cornbread batter atop the Meat Layer, butting them against each other. Bake for about 40 minutes or until Meat Layer is bubbly and the Cornbread Layer is fully cooked. Cover and let cool for about 10 minutes. Serve and savor!


KITCHEN NOTES
Play around with the ingredients in the Meat Layer, adding more vegetables to extend the meat further or to feed more mouths. If using slower-to-cook vegetables such as carrots, winter squash or sweet potato, cut them into very small cubes so they'll cook evenly and quickly.

A Veggie Venture - Printer Friendly Recipe Graphic


MORE CORNBREAD RECIPES
~ Sweet Cornbread ~
~ Pumpkin Cornbread ~
(which I made earlier this week and inspired the casserole's topping)
~ more cornmeal recipes ~
from A Veggie Venture

~ Skillet Cornbread ~
~ Apple Cider Indian Pudding ~
~ more cornmeal recipes ~
from Kitchen Parade


Looking for healthy ways to cook vegetables? A Veggie Venture is home to hundreds of quick, easy and healthful vegetable recipes and the famous Alphabet of Vegetables. Healthy eaters will love the low carb recipes and the Weight Watchers recipes.
© Copyright 2009

reade more... Résuméabuiyad

Rosemary Potatoes ♥ Recipe & Roasting Tips

Just in time for roasting fall vegetables, four tricks for roasting starchy vegetables like potatoes and winter squash using less oil without compromising on texture or flavor.

Here in St. Louis, we're caught in that lovely 'bridge' between summer and fall. There's no deciding whether to slice up a quick Insalata Caprese to get the final fill of summer tomatoes or to tip over into autumn's vegetables. The solution? Salad for lunch, potatoes for supper! These Rosemary Potatoes, talk about comfort food when paired with Meatloaf. Turns out, however, that the technique used here for the potatoes can be applied to roasting other vegetables as well.

Roasting vegetables, it's the number one way to draw out flavor and sweetness. But over the years, I've watched various recipes call for so much oil. Where A Veggie Venture allows for 1 tablespoon of fat per pound of vegetables (for most although not all recipes), other recipes call for four to eight times that. No wonder those vegetables taste so good!

So here are four tricks to roasting vegetables with less oil, ones that can be applied to one vegetable after another:

DIRTY A DISH If you drizzle oil over top of the vegetables right on the baking sheet, you'll need more, it's just not as easy to cover the cut surfaces. So to reduce how much oil is used, toss the vegetables and oil together in a bowl, tossing well, more than one or two turns. You really want to distribute the oil.
ADD A LIQUID Extra liquid helps distribute the oil further. In this recipe it's balsamic vinegar, but you could use chicken stock too. I even wonder about buttermilk though haven't tried it. (Has anyone?) I might also mix good mustard into some chicken stock.
ADD FLAVOR The balsamic vinegar is a brilliant touch in the flavor department, for it adds color, and sugars that caramelize and the great complementary acid that works so well with the creaminess of the potatoes. With that touch of rosemary, too? Delicious. An added benefit? These potatoes are filling and satisfying, the portion size doesn't seem skimpy.
ALLOW TIME So many recipes call for roasting at a medium temperature for a short period of time, hardly enough to cook the potatoes through let alone drawing out flavor. Instead, use a high temperature and toss often, distributing moisture and heat and letting more than one surface take the brunt of the heat.

ROSEMARY POTATOES RECIPE

Hands-on time: 10 minutes plus occasional attention during the roasting
Time to table: 1 hour, 15 minutes
Serves 8

2 pounds small red potatoes, some times labeled 'new' potatoes
1 tablespoon olive oil
2 tablespoons balsamic vinegar
1 teaspoon kosher salt
1 tablespoon fresh rosemary leaves, chopped small

Additional kosher salt

Set oven to 400F. Wash the potatoes well, remove any blemishes and anything sprouting from the potato eyes. Cut into quarters. (If you're in a rush, the smaller the pieces, the quicker the potatoes will cook.) In a large bowl, toss the potatoes with the remaining ingredients -- use your hands, it'll go quicker and you'll get tactile confirmation of how well the oil is distributed. Transfer to a rimmed baking sheet and roast for about an hour, tossing every 15 minutes. During the last 15 minutes, be sure that a cut-side of each potato piece is touching the pan. If needed, roast further until at least some of the pieces are quite dark and caramelized. If needed, season with additional salt. Serve and savor!


A Veggie Venture - Printer Friendly Recipe Graphic


MORE ROASTED VEGETABLE RECIPES
~ Slow-Roasted Tomatoes ~
this is what's making my kitchen smell like a tomato factory this week!
~ Roasted Cauliflower ~
~ Roasted Potato & Red Onion ~
~ Roasted Butternut Squash with Maple Glaze ~

~ more roasted vegetable recipes ~
from A Veggie Venture


MORE RECIPES pairing ROSEMARY & POTATOES
~ Grilled Rosemary Potatoes ~
from Panini Happy
~ Rosemary Potatoes ~
from Fearless Kitchen
~ Glazed Rosemary & Garlic Potatoes ~
from eCurry
~ more rosemary potato recipes ~
via Food Blog Search, a hand-selected list of the best food blogs
from all across the world


SPUD FUN (because I can't resist)
Well, a Girl Potato and A Boy Potato had eyes for each other, and finally they got married, and had a little sweet potato, which they called “Yam”. Of course, they wanted the best for Yam. When it was time, they told her about the facts of life. They warned her about going out and getting half-baked, so she wouldn't get accidentally mashed, and get a bad name for herself like 'Hot Potato,' and end up with a bunch of Tater Tots. Yam said "not to worry, no Spud would get her into the sack and make a rotten potato out of her!" But on the other hand she wouldn't stay home and become a Couch Potato either. She would get plenty of exercise so as not to be skinny like her Shoestring cousins. When she went off to Europe, Mr. and Mrs. Potato told Yam to watch out for the hard-boiled guys from Ireland. And the greasy guys from France called the French Fries. And when she went out west in the USA, they told her to watch out for the Indians so she wouldn't get scalloped. Yam said she would stay on the straight and narrow and wouldn't associate with those high class Yukon Golds, or the ones from the other side of the tracks who advertise their trade on all the trucks that say, 'Frito Lay.' Mr. and Mrs. Potato sent Yam to Idaho P.U. (that's Potato University) so when she graduated she'd really be in the chips. But in spite of all they did for her, one-day Yam came home and announced she was going to marry former NBC news anchor Tom Brokaw. Tom Brokaw!!! Mr. and Mrs. Potato were very upset. They told Yam she couldn't possibly marry Tom Brokaw because he's just... well he's just a... A COMMONTATER !!!


Looking for healthy ways to cook vegetables? A Veggie Venture is home to hundreds of quick, easy and healthful vegetable recipes and the famous Alphabet of Vegetables. Healthy eaters will love the low carb recipes and the Weight Watchers recipes.
© Copyright 2009

reade more... Résuméabuiyad

Perfect Stovetop Brown Rice ♥ New Recipe for Cooking Brown Rice

Perfect Stovetip Brown Rice
Today's recipe: A new technique for cooking brown rice, yielding moist and flavorful grains of rice. No more gummy brown rice!

Who's noticed? If you follow the directions on a bag or box of brown rice, it turns out tough and gummy and unappetizing. It's no wonder that people turn to rice cookers for help -- or worse, douse brown rice with butter; or worse still, stick with the far less healthful white rice whose nutrients have been stripped away.

For winter, there's the oh-so-popular Oven-Baked Brown Rice that's just oh-so-perfect, yielding almost-nutty bites of moist, flavorful rice. Frankly, it's my favorite way to cook brown rice. But here it is, summer, and turning on the oven for an hour while the air conditioning runs seems to defeat the purpose. So I was intrigued to see Saveuer's new technique for cooking rice on the stovetop. It's dead simple and takes only an hour to get to the table, 15 minutes faster than the Oven-Baked Brown Rice.

Another good thing about this technique for cooking brown rice? It stays moist! So I don't hesitate to make a batch in the morning, then reheat for supper.

Three tricks for cooking brown rice:
Rinsing the rice, removing a dusty layer of starch.
Lots of water, keeping the rice grains fat and moist.
Finishing off heat, removing excess moisture.

PERFECT STOVETOP BROWN RICE

Hands-on time: 5 minutes
Time to table: 45 minutes (see ALANNA's TIPS)
Makes 3 cups cooked rice

12 cups water
1 cup brown rice, rinsed under cold water for 30 seconds
Kosher salt to taste

Bring the water to boil in a large covered pot (see TIPS). Add the rice, stir once to distribute, then cook uncovered for 30 minutes, adjusting the heat to maintain a fast simmer. Pour the rice through a strainer, then return to the hot pot and add salt to taste. Off heat, cover and let rest for 10 minutes. Fluff with a fork. Serve and savor!


ALANNA's TIPS & KITCHEN NOTES
It seems to take forever to bring a pot of water to boil on my stove. It helps to cover the pot. But often I put the pot on the stove with say, 4 cups of water and set it on HIGH. Then I add the remaining 8 cups of water from one of my favorite kitchen gadgets, an electric kettle. This same trick works for pasta water, too.
This recipe works for plain brown rice, any one you'll find. I'm a particular fan of the rice from Lundberg which I find at Whole Foods. The rice that's pictured is a blend of sweet brown rice, short grain brown rice, long grain brown rice, whole grain Wehani rice, whole grain Japonica rice. If you like the idea of blends, check out Oven-Baked Brown Rice where I substitute wild rice (and since then, other rices and grains) for some of the brown rice. I love the color variation.

A Veggie Venture - Printer Friendly Recipe Graphic


MORE RICE RECIPES
~ Tomato & Rice Salad ~
~ Eight-Ball Stuffed Zucchini ~
~ Julia Child's Yellow Squash Soup ~
(thickened with cooked rice)

~ more recipes with rice ~
~ more Weight Watchers recipes ~


Looking for healthy ways to cook vegetables? A Veggie Venture is home to hundreds of quick, easy and healthful vegetable recipes and the famous Alphabet of Vegetables. Healthy eaters will love the low carb recipes and the Weight Watchers recipes.
© Copyright 2009

reade more... Résuméabuiyad

Blueberry Pie


This pie rocks! It was the best blueberry pie I've ever had! I'm super proud to have made it!

That's pretty impressive since I almost never have the opportunity to make a pie. It's been years since I've made a pie, and I've never made a blueberry one. So I'm patting myself on the back and saying "good girl, Meryl."

Why, do you ask, do I never get to make pies? To begin, it's just Joe and I (and the dogs), and we struggle with weight issues. So the last thing we need around here is an entire pie sitting on the counter top. And during all the holidays when people make pies, all the pies are spoken for by other members of the family. The one or two times that I tried to add to the repertoire of pies, my pies were practically untouched, so I gave up. Perhaps I lost my pie-baking confidence as well. So, I just don't make them.

I bought this Longaberger pie plate from my friend Karen about 4 years ago, and up until last Sunday, I hadn't used it yet:


But last Sunday we were invited to a friend's for brunch. She was going to make a peach pie for dessert, and that was very nice of her! But knowing that Joe wouldn't have touched it with a 10-foot pole, I offered to make a blueberry pie (blueberry is Joe's favorite pie).


She accepted, and I thought to myself that I had gotten into a conundrum. I would have to live up to Joe's idea of a blueberry pie, and that idea was his mom's blueberry pie. Oy vey! That's a lot to live up to.

I found a well-liked recipe for a pie on Epicurious.com. Well, the filling was well-liked and the crust was not. Many of the reviewers only suggested to double the cornstarch, so I did. I accidentally omitted the butter when I made my pie, but it wasn't missed.

The crust I used came from my friend Karen. I've posted her recipe as well.

If you are looking for a great blueberry pie, look no further! This is the one.


Blueberry Pie
Filling inspired by a Gourmet Magazine recipe

6 cups blueberries, picked over
1/2 cup cornstarch
1 cup sugar
2 tablespoons fresh lemon juice
1/2 teaspoon freshly grated nutmeg
1/2 teaspoon salt
2 tablespoons half-and-half or milk (optional - to top the crust)
turbinado sugar or large-grain cane sugar (to top the crust)

Karen's No-Fail Flaky Pie Crust


Preheat the oven to 425°F.


In a large bowl toss together the blueberries, the cornstarch, sugar, lemon juice, nutmeg, and the salt. It might be easiest to use your hands so you don't crush all the blueberries. Mound the filling in the shell.

If you use the butter, place little pieces of it around on the top.

Place the top crust over it and crimp the edges.


Be sure to use a knife and make air vents in the top crust. I made a smiley face with some outer slashes like short rays of sunshine. Next time I do it, I will remove slivers in the smiley face.

Bake the pie in the bottom third of the oven at 425 for the first 20 minutes. Then reduce the heat to 375 (leaving the pie where it is) and bake for another 25-35 minutes. I baked mine 30 minutes and wish I had taken it out a few minutes sooner. But it was acceptable nonetheless.


reade more... Résuméabuiyad

Karen's No-Fail Flaky Pie Crust

I'm not accustomed to making pies, so when I needed to make one and I found myself visiting my friend Karen, I asked her if she had a no-fail, flaky pie crust recipe. I had a feeling she did, and I was right!

I thank you Karen for this wonderful crust recipe. It was perfect! So easy and simple, that even a pie buffoon like myself could use it and impress her friends.

Karen doesn't even roll out this pie crust. She puts it in the pie pan and spreads it out to fit it with her hands. But in the few times I've made crusts in my life, I've had problems, so I put the chilled dough between sheets of wax paper and rolled them out. It worked like a charm. I only wish I had a little more on the bottom crust. It didn't look too thick, but maybe I could have rolled it out a bit more to have more to play with on the outer edge.


Karen's No-Fail, Flaky Pie Crust
makes a double crust for a 9" pie

2 cups flour
1 1/2 teaspoons sugar
1 teaspoon salt (I used more like 2/3)
1 egg
1 tablespoon vinegar
1/4 cup water
3/4 cup shortening

Mix the dry ingredients in a bowl.

Cut in the shortening. I used this tool pictured.

In a separate bowl, beat the egg, vinegar, and water.

Mix in the dry ingredients.

Use your hands to form it all into a ball.

Split the ball in two. One ball should be larger for the bottom crust.

Wrap them in plastic wrap and chill for at least two hours.

When it is time to make the pie, roll out the dough balls between sheets of wax paper.

I learned a little trick to get the dough from the counter to the pie pan when I was watching Sara Moulton the Food Network a long time ago. Fold the dough over in half once, and then again in the other direction. Then place it in the pie pan and unfold. It's much easier than trying to lift the thin sheet of dough.

Karen freezes hers sometimes so she has it ready-made for later.

I used this crust to make my Blueberry Pie.

reade more... Résuméabuiyad

Costa Rican Beet Salad


I love beets. I cannot say the same for my husband, but I can say the same for my friends, Phyllis, Jennifer, and Scott. So I took advantage of spending time with them on Sunday to make some beets.

This Costa Rican Beet Salad is the best I can do to re-live a fond food memory. I studied at the University of Costa Rica in San José for a semester and they served a beet salad that I loved on campus there. That beet salad was near and dear to my heart.

I'm sad that I forgot to save a sprig of the beautiful cilantro for the picture and I had to use a sprig of flat leaf parsley. It was better than nothing. But know, that the cilantro was a wonderful flavor in this dish.

Also, there really are few ingredients. That’s great, because I was originally going to make a salad that had many ingredients and would have cost a bundle. Like many of you, I recently lost my job, so I have to be careful about how much I’m spending.

This salad may have served four, but not if those four wanted large portions. I had more beets because I was originally going to make two different beet salads, but decided to double this one when I realized how little salad I had when I was done.

This recipe will be in the regular recipe rotation around here. It was scrumptious and easy. And who doesn’t like an easy recipe!

Oh, in the picture, I was sad to have to use a sprig of parsley for decoration on the beet salad. I had forgotten to save a sprig of cilantro. Cilantro was an important flavor in the salad. I was gentle with the cilantro - Phyllis liked that it was on the subtle side. But the salad wouldn't be the same without it.


Costa Rican Beet Salad

Inspired by a recipe posted on Recipezaar.com by Cheerleader

4 medium fresh beets
1/4 sweet yellow onion, minced (I used vadalia)
1/3 large yellow pepper, finely diced
2-3 Tablespoons chopped cilantro
4 tablespoons mayonnaise
salt to taste (if you must – truth is, I didn’t)

Prepare the beets and remove the skins.

Dice the beets into small squares

Add minced onion, cilantro, and sweet pepper. This is what I had before I added the mayonnaise:


Add mayonnaise and gently mix thoroughly.

Add the salt if you use it.

reade more... Résuméabuiyad

Preparing and Cooking Beets - The Boiling Method

Beets are easy to work with and there are several ways to prepare them. In the cold weather it's nice to put them in foil packs with the skins on, baked them, and then removed the skins when done. In the summer, I choose the boiling method.

When choosing your beets at the grocery store, try to get a bunch that has beets of approximately the same size. By doing this, you will have beets that finish cooking at the same time. If they aren’t the same size, be aware that the smaller ones will finish cooking sooner. You will need to remove them earlier so you don’t have beet mush!

Preparing the Beets

Cut off the greens at the base of the beets.

Cut off the tail of the beet.

Leave the skin on the beets! This is very important!

Boil the water first and then place the beets in it. I started out with a 30 minute time limit with the pot covered. Check the beets by piercing them (or attempting to pierce them) with a fork or knife. When the fork or knife easily pierces the beet and goes toward the middle, coming out with no effort, the beets are done!
Beets shouldn't be cooked al dente.

When I checked at the 30 minute mark, I knew that at least another 30 minutes would be necessary. I had chosen large beets at the store.

Thirty minutes later, I set the timer for 10 more minutes. At that point, my two smaller beets were done. I removed them and ran cold water over them while I removed the skins. By the time I was done with that, a few more of the beets were done, and so on and so on.

Important Note About Skin Removal

If you want to place the beets in a bowl of cold water before handling them, do it with the skins on!

Case in point – I removed the skins of the first two small beets and then cut them in half and put them in cold water. I forgot to do it with the next beets, and I’m so glad! Look at the difference in the color of the beets I cut in half and then placed in cold water without skin compared to the beets that I place in cold water with the skin on and in tact before removing the skin:


Removing the skin is easy when the beets are cooked. I took the picture below without the water running just so you could see that all it takes is a little pressure with your thumb and pulling away. The skin will go with it. Easy-peasy! Even easier under running water.


Now you are ready for any beet recipe, such as Costa Rican Beet Salad, or to just eat them as they are.

reade more... Résuméabuiyad